“`html
Identify Your Oak Damage First
I’ve spent the last five years repairing oak cabinets in client homes, and I can tell you straight—the damage type determines everything. Oak isn’t forgiving like pine. Its open grain structure means repairs sit visibly, and moisture swelling means gaps that close unpredictably. Before you grab any filler, diagnose what you’re actually fixing.
Start by running your fingers across the damaged area. Surface dents feel shallow — a half-inch deep max. These sit in oak’s topmost grain layers and often need putty, not filler. Gaps between cabinet boards tell a different story. Oak swells with humidity, so gaps wider than 1/16 inch suggest seasonal movement, not static damage. Deep gouges (anything touching wood more than an inch below the surface) demand epoxy filler because putty won’t hold structural integrity.
Here’s the critical part for oak: stain acceptance varies wildly between repair products. Wood filler is porous and accepts stain similarly to oak. Putty sits on top and requires matching paint or dark stain to hide. Epoxy doesn’t accept stain at all — you match it by sanding to the exact color oak turns after finishing.
Kitchen and bathroom cabinet repairs face extra pressure from humidity. Oak expands and contracts roughly 0.1 percent across its grain annually. A filler that shrinks during drying (most do) will pull away from oak’s edges as the wood moves seasonally. This is why epoxy, which doesn’t shrink, works better in moisture-prone areas than water-based fillers.
Best Wood Fillers for Oak Cabinet Repairs
For Surface Dents and Small Gouges
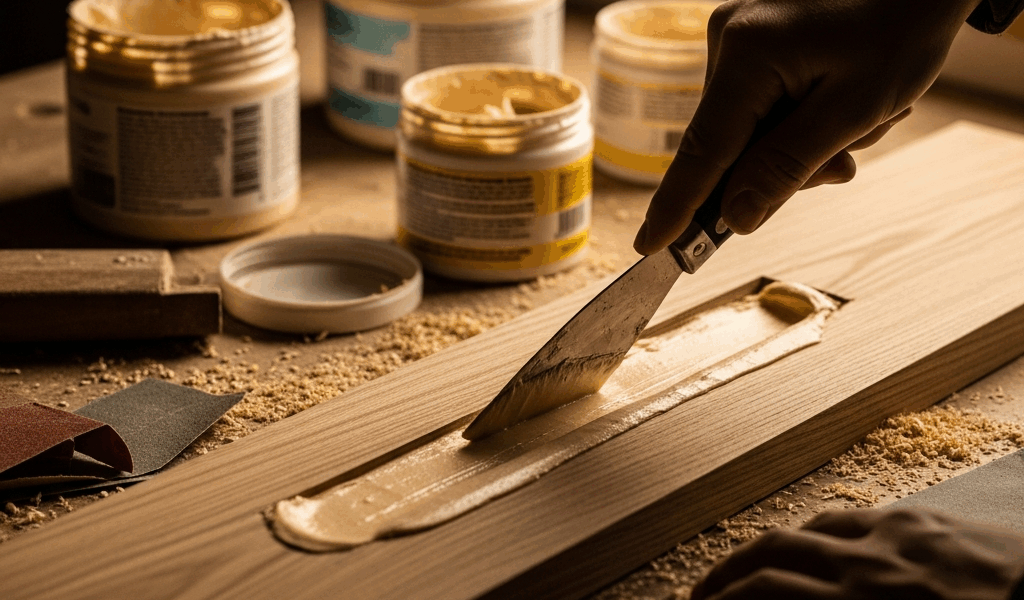
Timbermate Wood Filler is my go-to for visible oak repairs. It’s water-based, accepts stain beautifully, and dries in 24 hours — long enough that you can adjust it if needed. Cost runs about $12 for 8 ounces. The catch: it shrinks 10-15 percent, so you’ll overfill. On oak, that’s acceptable because the grain structure accommodates settled filler without showing edges. Stain compatibility is excellent — it takes on oak stain identically to surrounding wood.
Minwax High Performance Wood Filler is faster (2-3 hours dry time) and costs roughly $8 for 16 ounces. It’s thicker than Timbermate, which means easier application in small dents. However, it shrinks more aggressively (20 percent), and stain acceptance is inconsistent — some batches pick up color unevenly on oak. I’ve used this in closets and hidden areas where drying speed matters more than perfect color match.
For Gaps Between Oak Boards
Gaps need flexibility and minimal shrinkage. Epoxy wood fillers excel here because they cure rigid without shrinking. Elmer’s Carpenter’s Wood Filler (the yellow tube) sounds basic, but on oak it’s reliable. It’s latex-based, water-cleanup, and shrinks minimally — under 5 percent. Dries in 4-6 hours. At $6 per tube, it’s economical for multiple gaps. Drawback: doesn’t accept stain well, so gaps need finishing after application — either paint or dark sanding conditioner to blend.
For kitchen cabinets specifically, I recommend Bondo Wood Filler. It’s epoxy-based, cures in 15-20 minutes, and doesn’t shrink. This matters for gaps that’ll experience humidity cycling. Cost is higher ($15 for 16 ounces), but durability on oak beats water-based options in damp environments. One honest note: Bondo is brittle once cured. If a gap is in a high-impact area (near a cabinet edge you brush against), Bondo will chip. Reserve it for stationary gaps.
For Deep Gouges and Structural Repairs
Two-part epoxy fillers are non-negotiable here. West System 105 Resin with 206 Hardener is professional-grade, used on fine furniture. It’s expensive ($40+ for a kit), but it cures without shrinking, sands cleanly on oak’s dense grain, and accepts stain if you use thin topcoats. Dry time is 24 hours, working time is 15-20 minutes. Overkill for cabinet cosmetics, but essential if damage approaches structural territory.
For a middle ground, Gorilla Wood Filler (polyurethane-based) costs $10 for 18 ounces and cures in 2-4 hours. It shrinks minimally, sands well on oak, and accepts stain acceptably. I’ve used this on cabinet interiors where stain matching isn’t critical but structural integrity is.
Step-by-Step Application for Oak
Prepping oak correctly is where amateurs falter. Oak’s grain raises when wet, so water-based fillers trigger grain swelling. You must sand the area first — 150-grit minimum, not 120 — because oak’s dense grain structure splinters under coarser grits. Sand perpendicular to the grain, not along it, to avoid creating visible scratch patterns.
Vacuum out dust thoroughly. Oak particles lodged in grain create dark streaks around the repair once stain is applied. I use compressed air after vacuuming to clear deep grain pockets.
For Timbermate (water-based) on oak:
- Mix according to package directions — consistency should be peanut butter thick
- Overfill the damage by 30 percent. Oak’s settled filler sinks noticeably
- Feather edges with a damp putty knife — drag from the filled area outward at 45 degrees
- Let dry 24 hours in a room between 65-75°F. Temperature matters; below 60°F, water-based fillers dry cloudy on oak
- Sand with 150-grit first, then 220-grit to match surrounding wood texture
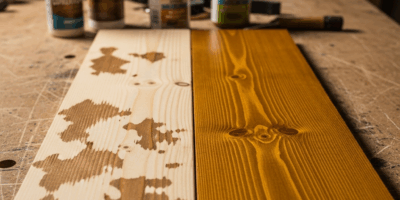
- Apply pre-stain conditioner (Minwax brand, $7) to prevent blotching — oak bleeds stain unevenly around repairs
- Stain to match. Test on scrap oak first; filler may absorb stain differently than wood
For Bondo on oak gaps:
- Mix 1:1 resin to hardener on a disposable surface
- Working time is 15 minutes, so move fast
- Pack gaps tightly with a putty knife — don’t overfill; epoxy doesn’t shrink
- Cure 20 minutes before sanding
- Sand with 150-grit first (epoxy is harder than water-based filler, so it demands more aggressive sanding)
- Skip pre-stain on epoxy repairs — Bondo doesn’t accept stain, so match color with sanding conditioner or finish over it
Temperature matters more than you’d think. Oak at 50°F and 80°F will expand and contract differently, causing filler to separate if cured in one condition and exposed to another. Cure in the cabinet’s actual climate — don’t rush it in a warm garage if the kitchen stays cool.
When Putty Wins on Oak
Probably should have opened with this section, honestly. Not every oak cabinet repair needs filler. Putty — the stick kind, like Minwax Putty Sticks ($6 for a set) — sits on top of wood rather than sinking in. This matters when the cabinet is already stained and polyurethane-finished.
If your oak cabinets have visible finish applied, adding water-based filler means stripping and refinishing that entire section to blend the repair. Putty avoids that. It’s cosmetic only — you smooth it over dents, let it cure, then sand flush with surrounding finish. No stain needed because putty comes in oak-matched colors.
The trade-off is durability. Putty doesn’t cure hard. It’s perfect for hidden cabinet interiors or low-impact areas. On the edge of a cabinet door that sees daily contact, putty will compress over months. Filler won’t.
Apply putty by pressing it firmly into the damage, overfilling slightly, then sanding level once cured (2-4 hours). It’s slower than filler but avoids the messy refinishing problem.
Avoid These Oak Cabinet Repair Mistakes
Using softwood filler on oak is the first killer mistake. Pine fillers are designed for pine’s soft grain. Oak’s dense structure won’t grip them the same way. The repair looks visually different — lighter, less substantial — even after staining. Always specify “wood filler for hardwoods” or “oak filler.”
Skipping pre-stain conditioner on oak is how repairs look obviously repaired. Oak bleeds stain unevenly. Filler accepts stain in one tone; surrounding oak accepts it in another. A $7 bottle of conditioner prevents this blotchiness. I learned this the hard way on a client’s dining room cabinet — the repair was invisible until stain went on, then it screamed.
Under-filling happens constantly. Fillers shrink. Oak expands and contracts with seasons. A filler applied flush with the wood surface will sink as it dries, then gap further as oak swells. Overfill by 25-30 percent minimum, especially on water-based products.
Wrong sanding grit progression ruins oak cabinets. Start at 150-grit, move to 220-grit, finish with 320-grit. Jumping straight to 220-grit on oak leaves visible scratches because the grain structure is dense enough to show medium-grit patterns. Too-coarse grits (80-120) splinter oak’s edges around the repair.
Visible repairs on oak happen because finishing steps get skipped. Filler alone looks like filler. You need pre-stain, stain, and polyurethane topcoat to integrate it. Many DIYers apply filler, sand, then stop — expecting the wood to look repaired without finishing. On oak, which is a premium wood with visible grain, that’s guaranteed failure.
The cabinet location matters more than most realize. Structural repairs (gaps widening due to wood movement) need epoxy. Cosmetic repairs (dents, gouges that aren’t opening wider) can use water-based filler. If you fix a gap with water-based filler and the oak keeps swelling seasonally, the filler will fail. You should have used epoxy or accepted that the gap is structural and requires different solutions (shims, clamps, joint reinforcement).
Start with damage diagnosis, match your filler to the damage type, and commit to proper finishing. Oak’s beauty demands precision — half-measures leave repairs visible for years.
“`

Stay in the loop
Get the latest master wood crafters updates delivered to your inbox.