“`html
Diagnose Your Gap Before You Buy Anything
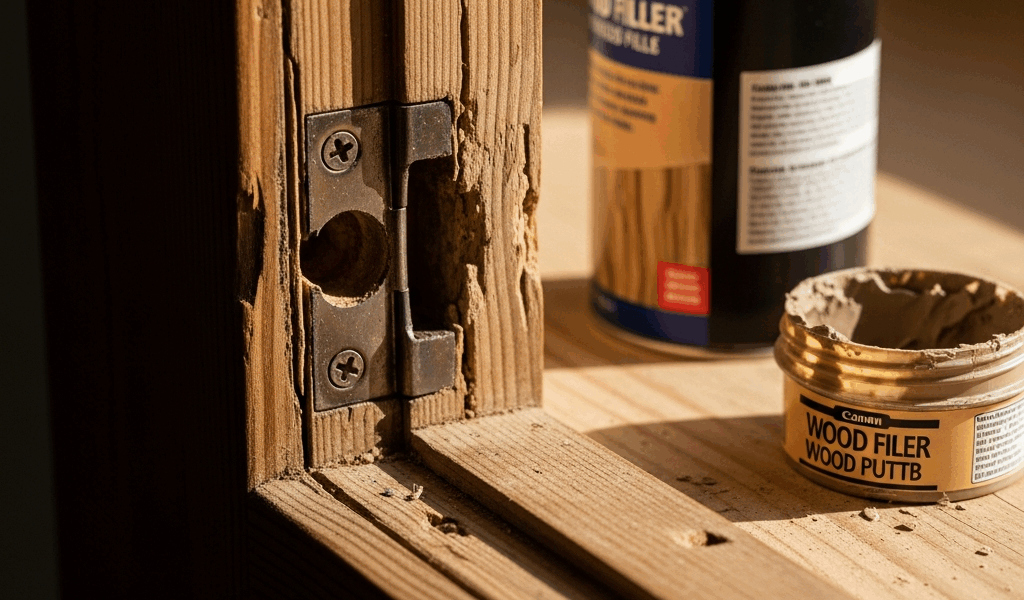
You’ve got a gap. Maybe it’s between your trim and wall, maybe it opened up in a tabletop, maybe a screw hole’s staring at you. The moment you walk into the store—or worse, order online—you face the wood filler vs putty question, and it’s genuinely the wrong question to start with. The right question is: what am I actually looking at?
Stop measuring with your eyes. Grab a ruler. This one decision—gap width—determines everything that follows.
A hairline crack or small screw hole running under 1/8 inch wide? That demands putty. A gap wider than a pencil, say 1/4 inch and up? That demands filler. Anything in between and you’re basically guessing, which wastes time and material.
Beyond width, consider location and finish. Is this gap on stained walnut trim you’re trying to match? On painted cabinet trim where color doesn’t matter? On raw wood before finishing? On a floor where the gap flexes seasonally? These details flip your answer entirely.
Location matters too — a gap in hardwood flooring moves with humidity changes, a gap in a countertop gets heavy traffic and movement, a gap in decorative trim that nobody touches is low-stress. Putty handles flex; filler doesn’t. Choose wrong and you’ll sand through the finish or watch your repair pop back out within weeks.
Use Putty for Holes and Small Cracks on Finished Wood
Putty is your choice when the gap is small, the wood is already finished, and you can’t afford a second coat of anything.
Putty stays flexible after it hardens. It doesn’t shrink — or shrinks so minimally you won’t see it. You press it in, smooth it flush or slightly proud, let it cure in place, and you’re done. No sanding, no dust, no secondary finishing. On stained wood especially, putty is the workaround because you can match the color without touching your stain job.
The practical range: putty works cleanly for gaps up to about 1/8 inch wide. Stick to that. I made the mistake early on of trying to fill a 3/16-inch gap in cherry trim with putty. It looked fine for three weeks. Then it shrank enough that I could see a hairline shadow. Had to scrape it out and use filler instead.
Pros reach for Sarco Plastic Wood or DAP Fast ‘N Final on finished surfaces — both accept stain reasonably well, cure hard enough to hold up to light wear, and sand if you absolutely must (though you shouldn’t need to). Sarco runs around $6 for a small can; DAP is similar. The Fast ‘N Final line cures in 30 minutes, which matters if you’re painting over it same-day.
Application is straightforward: overstuff the hole slightly, use a putty knife to smooth it level, let it harden. For small screw holes in finished cabinets, this is your move. Hairline cracks in door frames? Putty. Small dents that didn’t expose bare wood? Putty first.
Here’s the failure case — I watched someone try to fill a 1/2-inch gap in baseboard trim with putty. It looked acceptable for two days. By day four, it had cratered visibly and cracked straight down the middle. The shrinkage was too aggressive; putty isn’t formulated for that volume. They had to dig it out with a chisel and start over with filler.
Use Filler for Wide Gaps and High-Shrinkage Areas
Wood filler is engineered to shrink. This sounds counterintuitive until you realize: shrinkage means it cures level with the surface automatically.
Filler works for gaps 1/4 inch and wider, especially in structural areas or where the gap moves. Hardwood flooring, tabletops, door frames that see vibration — filler is your material because it bonds hard and stays put even if the wood shifts slightly.
The trade-off is simple: filler requires sanding after it cures. You fill proud (overstuffed), let it harden per instructions (usually 3–24 hours depending on product and thickness), then sand it flush. That’s the designed workflow. Skipping the sanding leaves a raised bump that catches light and screams “repair.”
Minwax High Performance Wood Filler and Elmer’s Carpenter’s Wood Filler are the workhorses. Minwax is premium — it shrinks predictably, sands clean, and stains relatively reliably if you’re matching a finish. It costs around $8–12 for a quart. Elmer’s is cheaper at $4–6 and acceptable for painted work; staining is hit-or-miss.
Don’t use filler on small screw holes in visible trim. I learned this by doing exactly that. You fill a 1/16-inch hole with filler to be safe. Then sanding time arrives and you’re spinning 220-grit over a 1/16-inch target while the filler dust coats your whole workspace. One aggressive pass and you’ve sanded through to bare wood. Now you’ve got a pit instead of a hole. Recovery requires stain touch-up, which is its own mess.
Filler wins on flooring, where gaps expand and contract with humidity. It wins on countertops, where the surface gets used daily. It wins on furniture where the gap is structural — loose joint, seasonal movement, that sort of thing. But respect the drying time — humidity delays hardening. On a 50% humidity day, your 8-hour estimate becomes 12 hours. Rush the sanding and you’ll gouge it.
Application Checklist — Don’t Waste Material
Surface prep separates clean repairs from messy ones.
Step 1: Vacuum out debris. Seriously. Dust, old finish flakes, anything loose comes out with a shop vac or soft brush. Don’t oversaturate the gap with water unless you’re filling a wet surface (which you’re not — wet wood accepts nothing well).
Step 2: Select your tool by gap width. A 1-inch putty knife handles small screw holes. A 2-inch or 3-inch knife spreads material across wider gaps. The knife should span the gap width with margin on both sides. A 4-inch knife for a 1/4-inch gap is overengineering; you lose control.
Step 3: Press, don’t spread. Pack the material in with moderate pressure, working perpendicular to the grain. For wide gaps, you may need two applications — first layer packs the deep part, second smooths the surface. Wait for cure time between layers if using filler.
Step 4: Overfill intentionally. Putty gets smoothed slightly proud and allowed to harden; light shrinkage brings it flush. Filler gets overstuffed 1/8-inch high because sanding will remove that excess. Underfilling is the beginner mistake — don’t do it. An extra pass with the knife costs nothing; underfilled gaps cost a second application.
Step 5: Note drying times by product and conditions. Sarco Plastic Wood: 30 minutes to 2 hours depending on temperature. Minwax High Performance Filler: 2–4 hours at 70°F, much longer if humid. DAP products vary by line — read the can. Temperature and humidity add 25–50% to stated times in real houses. Plan accordingly.
Step 6: Sand or seal. Filler gets sanded with 150–220 grit once hard. Start with 150 if the surface is rough; finish with 220 for smoothness. Putty typically doesn’t need sanding; if you must sand putty, use 220 minimum (fine grit) to avoid gouging.
When You Pick the Wrong One and How to Fix It
You will pick the wrong one. Everyone does at some point.
Scenario 1: Putty in a 1/2-inch gap. It looked fine for a week, then cratered. Scrape it out with a flat chisel — work gently so you don’t enlarge the gap or damage surrounding wood. Vacuum thoroughly. Now apply filler. You’ve lost time but not the piece.
Scenario 2: Filler on a small, visible screw hole in trim. You’ve sanded half the trim trying to level a 1/16-inch repair spot, and now there’s a visible pit. If the finish is paint, hit it with matching paint and call it done — no one looks that close on painted trim. If it’s stained, touch up with stain matching the surrounding wood, then seal. It won’t be invisible, but it’ll be acceptable.
Scenario 3: Filler on a gap that moves (like a floor seam). Filler will crack within months because it’s rigid and the gap flexes. Before you dig it out, ask whether this gap should be filled at all. Many hardwood floor gaps are normal seasonal movement, not defects. If you absolutely must fill it, use a flexible filler like Bondo All-Purpose, which stays pliable longer. Standard wood filler will fail.
Scenario 4: Putty under stain you’re applying fresh. Putty doesn’t always accept stain evenly — color may be patchy or too light. If you’re staining raw wood with gaps, use stainable wood filler or accept that putty repairs won’t match perfectly. Test on a scrap first.
The common thread: you recovered without stripping the whole surface. These repairs aren’t irreversible. But they cost extra time. Diagnosing your gap width and location at the start avoids all of it.
Standing in front of your specific problem, remember the framework: hairline to 1/8 inch, finished surface, no sanding appetite? Putty. Quarter-inch and wider, structural area, or raw wood? Filler. Pick based on what you’re actually looking at, not generic product categories, and you’ll pick right the first time.
“`


Stay in the loop
Get the latest master wood crafters updates delivered to your inbox.