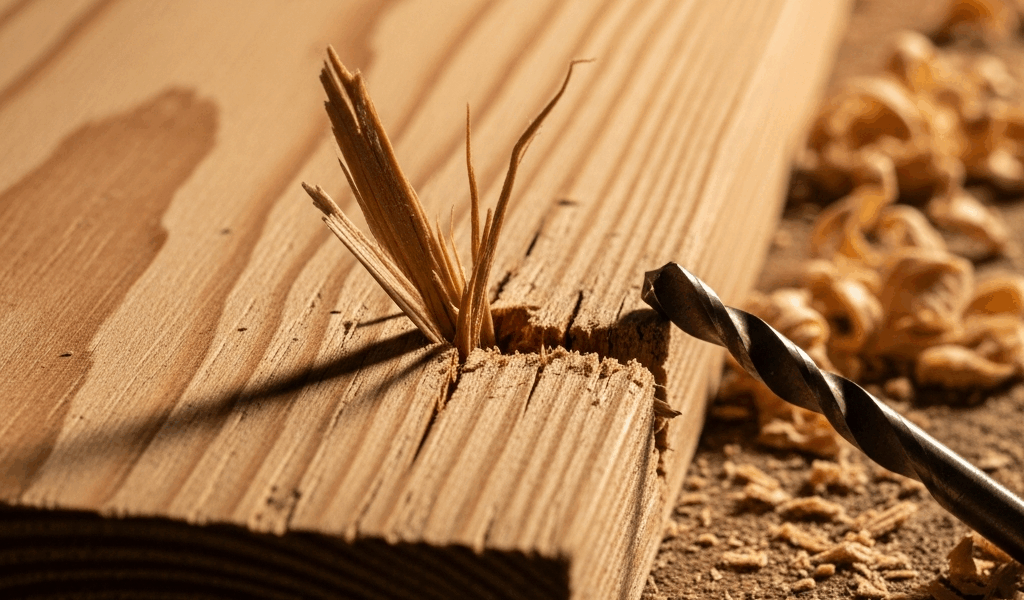
Why Wood Splits When You Drive Screws Near Edges
Screwing near board edges has gotten complicated with all the conflicting advice flying around — pre-drill, don’t pre-drill, use self-tapping screws, skip the pilot hole on softwoods. I’ve watched wood splitting when screwing near edges happen dozens of times. The first time it hit on a client’s tabletop, I panicked. Clean split across the grain, maybe three inches long, right where the frame rail met the edge apron. That was my wake-up call.
But what causes it, exactly? In essence, a screw is a wedge. But it’s much more than that. When you drive it in, those threads displace wood fibers outward — aggressively. In the middle of a board, the fibers have somewhere to go. Near an edge or end grain, they don’t. Pressure builds. The wood tears apart along grain lines, fast and ugly. Softwoods like pine compress easier, so they tolerate poor screw placement better. Hardwoods like oak or maple? They split hard and split angry.
End grain is the worst offender. Those wood cells run perpendicular to your screw’s direction of travel, resisting compression differently than face grain does. You’ll split end grain sitting half an inch from a screw that would never cause trouble two inches over. I’ve done it. More than once.
The Pilot Hole Fix and How to Size It Right
Probably should have opened with this section, honestly. This is the core fix — and I learned it the way most people do, by ignoring it and paying the price.
Your pilot hole should match the screw shank diameter, not the thread diameter. Sounds obvious once you read it. I spent years drilling holes that were too small, convinced a tighter grip prevented blowout. It does the opposite. Here’s a usable reference:
- #6 screws (about 3/32″ shank): use a 3/32″ bit
- #8 screws (7/64″ shank): use a 7/64″ bit
- #10 screws (9/64″ shank): use a 9/64″ bit
No exact bit? Go slightly larger, never smaller. A loose pilot hole creates less sideways pressure than a tight one. That’s what makes this fix endearing to us woodworkers — it’s counterintuitive right up until it saves your project.
The common mistake is thinking a snug pilot hole strengthens the joint. Near edges, a snug hole guarantees splitting. Threads need clearance to cut fresh fibers without forcing existing ones apart. On a recent maple dresser build, I switched to properly sized pilot holes throughout. Edge splits dropped from roughly one in three fasteners to zero in twenty. Don’t make my mistake.
Countersinking matters too — at least if you’re working hardwoods near edges. I’m apparently a Bosch person and the #2091 countersink bit works for me while generic no-name bits never seat cleanly. Paid about twelve dollars for it. Removes the sharp ring where the screw head meets wood, reduces lateral pressure. Not a cure-all, but it helps.
Edge Distance Rules That Prevent Splitting
Two times the screw diameter from an edge. Five times from end grain. Those aren’t guidelines — they’re physics.
For a #8 screw with a 7/64″ shank — roughly 1/8″ — keep it at least 1/4″ from an edge and 5/8″ from the end. For #10, that’s 5/16″ and 7/8″ respectively. These numbers solve most splitting problems before they start. So, without further ado, let’s dive into why end grain specifically causes such grief.
Those fibers run lengthwise, parallel to the grain line. A screw driving down has almost no support structure — it’s cutting through the ends of those fibers rather than pushing between them. Increase your end distance whenever possible. If you genuinely can’t, accept higher risk and use the pilot hole fix religiously. No exceptions.
Toe-screwing is an option when edge distance can’t increase. Drive the screw at a 15–20 degree angle toward the board’s interior instead of straight perpendicular. Distributes pressure over a longer grain path. I used this on a recent bookcase — shelves sitting right at the edge of the uprights — and it worked cleanly.
Species and Grain Direction Make a Big Difference
Pine splits less readily near edges than hard maple does. Poplar is even more forgiving than pine. This isn’t mysterious — denser wood has less compressive give, so the wedge action of a screw creates higher localized pressure. Simple as that.
Quartersawn lumber behaves differently than flatsawn. Quartersawn grain runs through the board’s thickness rather than across it, creating more uniform resistance. A screw near the edge of quartersawn material is less likely to split than the same screw in flatsawn — all else equal. I’ve found this matters most with hardwoods. Noticeable in maple. Barely visible in pine.
Dry hardwood splits more explosively than green or freshly milled stock. Moisture content affects fiber flexibility. A screw that holds perfectly in kiln-dried oak might cause a catastrophic split in wood that’s been sitting in a heated shop for six months. That was a $40 piece of white oak. I still think about it.
Practical fix: slightly larger pilot holes in hardwoods, especially near end grain. I’ll often bump up from a 7/64″ bit to a 1/8″ bit when working oak or maple at the edges. Feels counterintuitive. The looser hole reduces pressure — and the slightly reduced thread engagement doesn’t matter near edges anyway. The glue and pilot hole do the work, not the friction.
When the Wood Has Already Split — Salvage Options
The split is already there. Now what.
Clean split running parallel to the grain? Wood glue and clamps can work. Force glue into the crack using a thin applicator or a toothpick — seriously, a toothpick. Clamp perpendicular to the split to close it. Leave it 24 hours minimum. Once dry, the repair often outperforms the original wood because glue penetrates the fibers deeply. Works for splits that haven’t opened wider than about 1/16″.
Hairline cracks — visible but barely open — respond well to CA glue, the thin cyanoacrylate kind. A thin bead along the crack, no clamping needed. Sets in seconds. Hardens to near-wood strength. Not pretty, but functional.
Blowout at end grain, especially with chunks splintered away — you’re cutting back and redrilling. A split end grain usually can’t be reliably repaired on any load-bearing joint. Trim the damaged section, re-square the end, start fresh. It’s honest work and saves the rest of the board.
Be realistic about repair limits. A split opened more than 1/8″ with splintered surface fibers is unrepairable in any way that looks acceptable. Accept the lesson, cut back, move forward. I’ve learned this particular lesson three times so far. Hopefully you only need it once.


Stay in the loop
Get the latest master wood crafters updates delivered to your inbox.