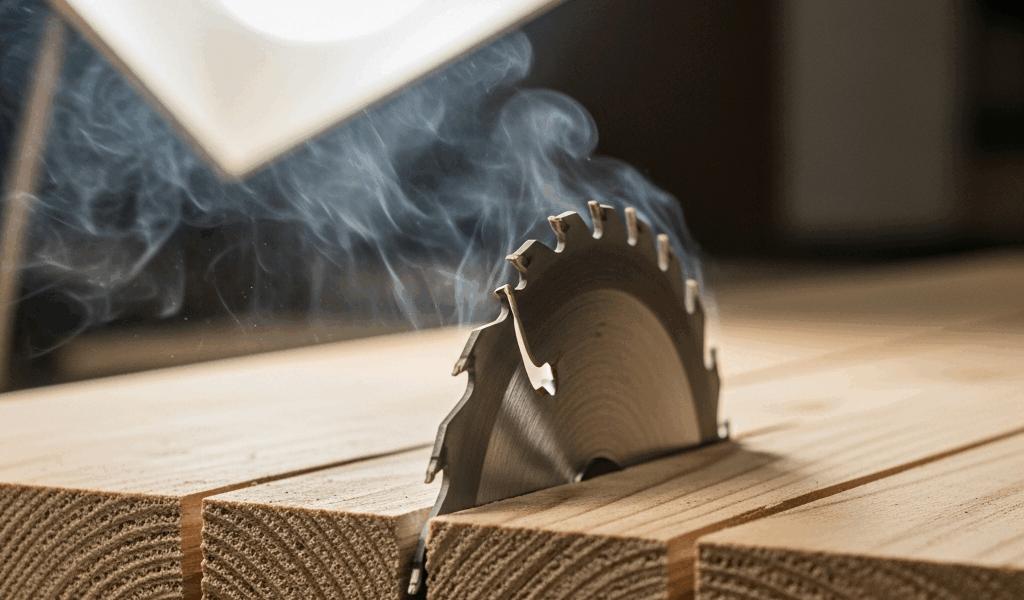
Why Your Circular Saw Blade Is Binding
Circular saw binding has gotten complicated with all the conflicting advice flying around. But after years of garage woodworking — and one genuinely terrifying moment where a sheet of plywood nearly launched itself across the room — I learned everything there is to know about what actually causes it. Today, I will share it all with you.
Here’s the short version: there are exactly three causes. They’re mechanical, not mysterious. And once you understand them, the fix is usually obvious.
The first is wood pinching the blade. But what is wood pinch, exactly? In essence, it’s when the kerf — that thin slot the blade cuts through — closes back up behind the spinning blade. But it’s much more than that. Lumber carries internal stress. As you cut, that stress releases, and the wood twists, cups, or simply sags, squeezing the blade like a slow vise. The motor whines. The blade locks. The saw kicks.
Second is a dull or mismatched blade. A dull blade pushes instead of cuts — generating heat, demanding more force, and bogging the motor down hard. Wrong blade choices do the same thing. A 100-tooth finish blade on thick oak, for instance, can’t clear sawdust fast enough. It chokes. It binds. It smells like burning.
Third is technique and setup. Blade depth set wrong. Feed rate too aggressive. Freehand cuts that drift sideways. That sideways pressure alone is enough to stop a blade cold.
How to Tell Which Problem You Actually Have
Probably should have opened with this section, honestly. Diagnosing the cause saves you money — specifically, it stops you from buying a $20 replacement blade when your actual problem is a sawhorse sitting in the wrong spot.
- Binding right at the start of the cut: Usually a blade issue — dull teeth or wrong tooth count for the material. The blade can’t get an initial bite.
- Binding in the middle of the cut: Almost always wood pinch. The kerf is closing behind you, or the offcut is starting to sag.
- Binding near the end of the cut: Poor support. The trailing end of the workpiece is dropping unsupported, and it’s clamping the blade as you finish.
- Smoke or a burning smell: Dull blade, wrong blade, or you’re pushing too fast. Friction heat. Back off immediately.
- Motor bogs down hard: Listen carefully here — if the motor is straining but the blade isn’t cutting, the teeth are dull. If the motor sounds fine but the blade just stops dead, it’s pinch.
- Saw pulling left or right, cut drifting: Technique problem. You’re either pushing at an angle or the blade has worn unevenly.
Each symptom points somewhere specific. Don’t skip this step.
Fixing Wood Pinch and Poor Work Support
The fix is straightforward in principle: support the workpiece on both sides of the cut. Not one side. Not mostly both. Both sides, flat and level, before you ever pull the trigger.
For crosscuts, position the board so the cut line hangs close to the edge of your work surface. The offcut — the piece falling away — needs a clear, unobstructed drop. If your bench is underneath it, the offcut sags and pinches. Let it fall freely. Two sawhorses set about 12 inches from each side of the cut line work well.
For ripping, I use a kerf wedge. Cut a small hardwood scrap — roughly 6 inches long, tapered to about 1 inch thick at the fat end — and drive it into the kerf behind the blade as you push forward. It props the cut open. Plastic kerf spreaders do the same job and run $8 to $12 at most hardware stores, but honestly a scrap of oak from the bin works just as well. Don’t make my mistake of skipping this step on stressed lumber.
Wet lumber and pressure-treated stock bind more aggressively than dry, stable material. Expect it. Slow down. Support everything carefully and make deliberate, unhurried passes.
One trick I use constantly: lay a sheet of 2-inch rigid foam insulation flat on the floor and cut full 4×8 plywood sheets directly on top of it. The foam supports both halves through the entire cut. No table saw required. No complicated workshop setup. I picked up a half-sheet of Owens Corning foam at Home Depot for around $14 — it’s been sitting in my garage for three years and still works perfectly.
Fixing a Dull Blade or Wrong Blade for the Job
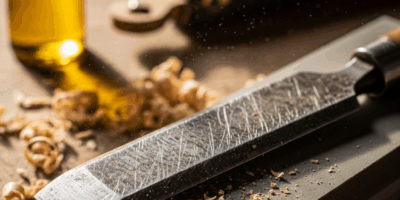
Dull blades are easy to spot if you know what to look for. Hold the blade up under a bright light and look at the tooth edges directly. Sharp teeth come to a point — they catch the light cleanly. Dull teeth are rounded off. You’ll see a small flat, shiny surface right where the cutting edge should be. That’s your culprit.
Behaviorally, a dull blade makes everything harder. The motor labors. Smoke appears. You find yourself leaning into the saw just to keep it moving. A sharp blade — a genuinely sharp one — almost pulls itself through the wood. That’s what makes a well-maintained blade endearing to us woodworkers.
For a hobby workshop, replacement usually beats sharpening. A DeWalt DW3106 10-inch crosscut blade runs roughly $18 to $22. Professional sharpening costs $12 to $18 per blade. Unless you’re attached to a specific blade, just buy new.
Tooth count matters more than most beginners realize. Crosscutting: 60 to 80 teeth. Ripping along the grain: 24 to 40 teeth. A 100-tooth finish blade on thick hardwood chokes on its own sawdust — the gullets are too small to clear it. A ripping blade on plywood tears the veneer badly.
I’m apparently a three-blade guy, and that system works for me while owning just one “general purpose” blade never did. One dedicated crosscut blade, one ripping blade, one for plywood and sheet goods. When any of them slows noticeably during a cut, it gets retired.
Fixing Cut Depth and Technique Mistakes
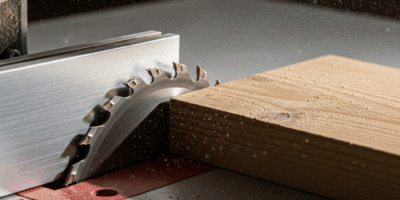
Blade depth: set it so the blade extends roughly 1/4 inch below the bottom face of your workpiece. No more. A blade set too deep drags unnecessary tooth surface through the cut, strains the motor, and increases binding risk. A blade set too shallow means fewer teeth engaging the wood at once — the cut runs hot and the saw works harder than it needs to.
Feed rate is the next thing people get wrong. Move the saw forward steadily — not fast, not cautiously slow, just steady. Feel resistance? Slow down. Don’t push through it. Forcing the saw overloads the teeth inside the kerf and they stop moving. Listen to the motor pitch. If it climbs higher, you’re moving too fast.
Freehand cuts drift. This is just physics — without a reference edge, the blade gradually angles through the wood instead of tracking straight down. That sideways pressure binds hard and fast. Use a speed square for short crosscuts, a clamped straightedge or a rip fence for longer runs. Even snapping a chalk line on the workpiece gives you something to track against.
So, without further ado, here’s the three-point check I run before every single cut: Is the workpiece supported cleanly on both sides? Is the blade sharp and matched to this specific material? Am I set up to push straight and steady without forcing it? Get those three things consistently right — blade binding becomes genuinely rare.

Stay in the loop
Get the latest master wood crafters updates delivered to your inbox.