“`html
What Router Bit Chatter Actually Sounds Like
Wood router bit chatter has gotten complicated with all the misinformation flying around, and honestly—it ruins projects faster than almost anything else I’ve encountered in the shop. But here’s what I discovered after years of troubleshooting my own setup: most people misdiagnose chatter before they even start fixing it.
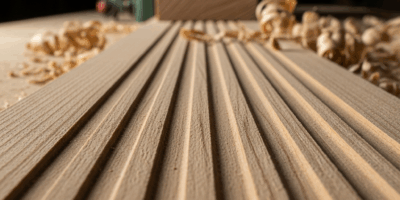
Chatter sounds like a high-pitched vibration, almost a stuttering hum underneath the normal router whine. Sometimes you’ll see it before you hear it—tiny chop marks running perpendicular to your grain direction, a surface that should be glass-smooth turning rough like 60-grit sandpaper. The router bit seems to bounce in and out of the wood rather than cut cleanly through it, which is exactly what’s happening.
That’s different from normal router noise. A healthy router has a consistent, relatively smooth sound—the kind you get used to after a few minutes. Chatter breaks that pattern. And here’s the mistake I made early on: I blamed the bit. Bought expensive bits, tried different brands, went through a dozen cutters before I realized the bit was usually innocent. The problem lived in the collet, the spindle, or how I was feeding wood through the machine.
Step 1 — Check Your Collet and Chuck Condition
Loose or damaged collets cause roughly 90% of router chatter. Probably should have opened with this section, honestly, because this is where you solve most of your problems before spending a dime on anything else.
Here’s the process—and it’s straightforward. Unplug the router first, non-negotiable. Let the spindle stop completely before you touch anything. Remove the bit by loosening the collet nut with the wrench that came with your router. For a Bosch 1617, that’s usually a 0.5-inch wrench; for a DeWalt D26200, it’s 9/16-inch. Don’t just crack it loose; fully remove the collet nut and pull the collet out by hand.
Now inspect that collet like you’re a quality control inspector at a factory. Look for three things: nicks or dents on the internal tapered surface where the bit sits, oxidation or debris buildup, and cracks running through it. Under a bright light, run your finger along the inside of the collet. You should feel absolutely nothing—no grit, no rough spots, no texture at all. A collet that feels textured will cause runout.
Debris is more common than you’d think. I’ve found sawdust, bits of shavings, even dried adhesive inside collets after months of use. Use compressed air at 80–100 PSI to blow out the collet cavity inside the router head itself. Hold the nozzle at an angle so you’re actually ejecting material, not pushing it deeper into the housing. Do this with the router unplugged and the spindle facing downward if possible.
Once it’s clean, wipe the collet with a dry cloth. Some woodworkers swear by a light machine oil, but I’ve learned that’s risky—oil can cause the collet to slip if you hand-tighten it. Stick with a clean, dry collet every time.
Now the critical part: hand-tightening alone will not secure a bit properly. I wasted weeks thinking my grip was strong enough. You need a wrench, and you need to tighten the collet nut firmly—firm enough that turning it requires real effort, but not so tight that you’re straining or deforming the nut itself. For most routers, 15–25 foot-pounds of torque is right. You won’t have a torque wrench on your bench, so think “firm hand-tightening with your full arm weight behind it,” not “gorilla strength.”
If the collet is visibly damaged—nicks deeper than 0.01 inches or any cracking—replace it immediately. Replacement collets run $15–40 depending on your router model. Spending that now beats ruining a tabletop later.
Step 2 — Test Spindle Runout with a Test Bit
Frustrated by chatter that wouldn’t disappear even after cleaning, I performed a simple runout check using a dial indicator clamped to my benchtop—and that’s when everything clicked into place.
Here’s how to do it. Chuck a 1/4-inch or 1/2-inch straight bit into your collet. It doesn’t have to be new—an old one works fine. The bit should be inserted about 1 inch into the collet, and the collet should be hand-tightened only, not wrench-tightened, so the bit spins freely. Clamp a dial indicator so the tip just touches the bit’s flute about halfway up the cutting length. Rotate the spindle by hand slowly—half a turn at a time. The dial should barely move. Anything greater than 0.005 inches and you have a spindle problem.
Most production routers should have runout under 0.003 inches. If yours is reading 0.010 inches or higher, the spindle bearings are likely worn, and at that point, the router needs professional service. Spindle repair isn’t a weekend project.
But here’s what I found: runout readings between 0.003 and 0.006 inches sometimes come from the collet, not the spindle itself. When you get a borderline reading, try a different collet if your router accepts multiple sizes—or clean the existing collet more aggressively. I used a soft brass brush once to gently scrub the inside of a collet, and it dropped runout from 0.007 to 0.002 inches. That made chatter vanish completely.
If runout stays high after collet replacement and deep cleaning, the spindle bearings are shot. Call a technician or buy a replacement spindle assembly if your router supports modular designs.
Step 3 — Adjust Feed Rate and Depth of Cut
Equipment checked out, collet cleaned, spindle tested—and chatter persists. Now we talk about how you’re actually using the machine.
Pushing too hard is the second leading cause of chatter. I learned this the hard way. When I first started routing edge profiles on thick walnut, I assumed faster results meant jamming the wood into the bit and powering through. The router screamed. The surface looked like a hedgehog. I was fighting the machine instead of working with it.
Depth of cut matters enormously. If you’re routing a profile and taking 0.5 inches per pass, you’re likely inducing chatter even with perfect setup. Start with 0.125 to 0.25 inches per pass. For harder woods like maple or ash, stay at 0.125 inches—softer woods like pine can handle 0.25 inches. Make multiple passes if you need deeper cuts.
Single-flute bits require slower feed rates than multi-flute bits, which is easy to forget. A single-flute 1/2-inch bit spinning at 18,000 RPM might need a feed rate of 20–30 inches per minute. A three-flute bit at the same speed can handle 40–50 inches per minute. If you don’t know your feed rate, you’re flying blind. A rough rule: the bit should pull the wood gently into the cut, not require manual pressure from you.
RPM selection gets overlooked constantly. A 3/4-inch bit running at 24,000 RPM is too fast and will chatter regardless of collet condition—that same bit at 12,000 RPM might cut beautifully. Larger bits need lower speeds. Smaller bits (under 0.5 inch) can run faster. Check your bit manufacturer’s recommended RPM range; it’s always printed on the shank or included with the bit packaging.
One more thing: warm up the router before cutting. A cold spindle with tight bearings will chatter for the first minute of operation. Plug in, let it run at your working speed for 30 seconds before you touch the wood.
Quick Fix Checklist and Prevention
- Clean collets monthly. Even if chatter isn’t happening, debris accumulates. Compressed air every time you store the router.
- Retire bits after visible wear. A dulled cutting edge induces chatter faster than a sharp one. When a bit has seen 50+ hours of use, replace it.
- Don’t mix collets and bits from different manufacturers. A Bosch bit might be 0.001 inches oversized compared to a DeWalt bit. That tolerance adds up quickly.
- Match RPM to bit diameter. Refer to the bit shank label. If it says “12,000–18,000 RPM,” run it at 15,000, not 22,000.
- Test runout after every collet replacement. One dial indicator check saves hours of troubleshooting.
- Start shallow and feed slowly. A 0.125-inch depth of cut at a deliberate feed rate beats a 0.5-inch pass at maximum speed.
- Keep your router dust-free. Sawdust inside the motor housing increases heat and accelerates bearing wear.
When spindle runout exceeds 0.010 inches and persists after collet replacement and deep cleaning, call a professional repair technician. Spindle bearing replacement requires tools most of us don’t own—and honestly, it’s not worth the risk of damaging something else.
“`

Stay in the loop
Get the latest master wood crafters updates delivered to your inbox.