What Those Tracks and Ridges Actually Mean
Planer marks have gotten complicated with all the conflicting advice flying around. Blame the knives, blame the feed rate, blame the wood — everyone’s got a theory. As someone who spent an entire afternoon swapping perfectly good blades my first year in the shop, I learned everything there is to know about this particular headache. Today, I will share it all with you.
There are two distinct patterns worth knowing. Telling them apart saves hours of unnecessary troubleshooting.
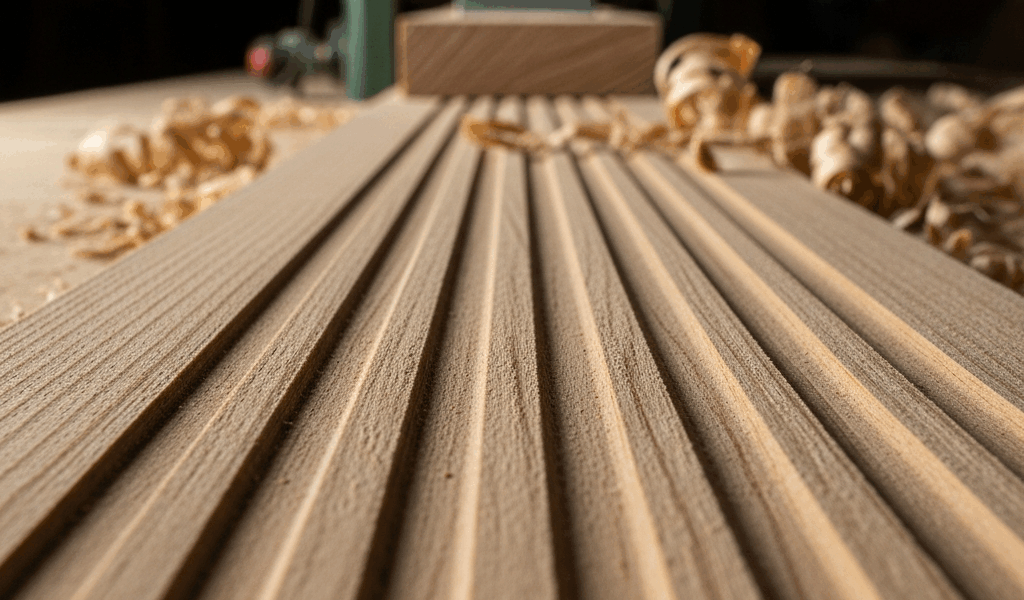
Parallel lines running lengthwise — these follow the grain direction. Shallow grooves or ridges that run the full length of the board. They’re almost always the feed rollers. Consistent, evenly spaced, and you can feel the flat spots if you drag your hand along the surface slowly enough.
Evenly spaced ridges across the grain — perpendicular to the wood’s length, repeating at regular intervals. That pattern points straight at cutterhead knives sitting at uneven heights. Sometimes a nicked blade catching the same spot on every rotation. Different problem, different fix.
Identifying which pattern you’re dealing with is your starting point. Everything else flows from that one observation. That’s what makes this diagnostic approach so endearing to woodworkers — it actually respects your time.
Dirty or Damaged Feed Rollers Are Usually the Culprit
So, without further ado, let’s dive in — starting here, with the fix that takes five minutes and solves the problem roughly 70% of the time.
The rubber feed rollers grip and push your board through the cutterhead. Over time — especially when you’re running pine, fir, or anything resinous — pitch and sawdust cake onto the roller surface. That buildup leaves imprints in the wood. Not dramatic damage. Just debris acting like a raised pattern on a rubber stamp.
Frustrated by visible tracks after planing a batch of knotty pine one Saturday afternoon, I cleaned my rollers for the first time using nothing more than a rag and some mineral spirits. Watched the problem vanish entirely on the next pass. Should have done that two years earlier. Don’t make my mistake.
Here’s what to check:
- Unplug the planer completely.
- Rotate the cutterhead by hand to expose the full length of each feed roller.
- Look for crusty buildup, pitch residue, or discoloration on the rubber surface.
- Wipe the rollers with a cloth soaked in mineral spirits or WD-40. For stubborn buildup, use a dedicated cleaner like Grip-Clean or a soft brass brush.
- Run the cloth along the full width of each roller — top and bottom both.
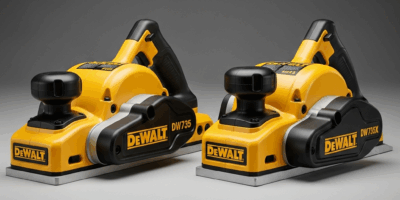
While you’re at it, inspect the actual rubber. Cracked, flat-spotted, or hardened rollers won’t grip evenly — even when spotless. A flat spot looks like a compressed section where the rubber simply isn’t round anymore. You can see it or feel it. If you find one, that roller needs replacement. Most planers run two rollers. A replacement set costs $40–$150 depending on your machine — I’m apparently a DeWalt person and the DW735 set ran me about $65 last time.
After cleaning, feed a test board through. Nine times out of ten, the tracks are gone.
Check the Chip Breaker and Pressure Bar
But what is the chip breaker? In essence, it’s the component sitting directly above the cutterhead that controls how the wood shears. But it’s much more than that — paired with the pressure bar just behind it, these two parts hold the board flat and determine surface quality on every single pass.
Factory settings aren’t always right. These components shift over time. If either one sits too high or too low, you get parallel ridges running with the grain — similar to roller marks, but with a slightly different character once you’ve seen both a few times.
Check their position by examining the gap between each component and the cutterhead. That gap should be consistent across the full width of the planer. The chip breaker typically sits 0.05 to 0.10 inches above the cutterhead. The pressure bar rides lower — almost touching. Probably should have opened with this section, honestly, because misaligned components waste more shop time than almost anything else.
If you spot debris — sawdust clumped with pitch, wood chips wedged between these parts and the cutterhead — clean it out first. That debris acts as a spacer and throws off the geometry completely. A thin brush or a short piece of 3/8-inch dowel works fine for dislodging it.
Consult your planer’s manual for adjustment procedures. Most machines have screws or levers for tweaking the height. Getting this right eliminates an entire category of track problems in one shot.
Cutterhead Knife Issues That Cause Ridge Patterns
Okay. Blades do matter. They’re just usually not the first place to look.
High knives might be the best explanation for repeating ridge patterns, as this problem requires only one knife sitting out of position. That is because even 0.005 inches of height difference — less than the thickness of a sheet of paper — leaves a thin line every time that knife completes a rotation. Lay a straightedge across all three knives to check evenness. Use a dial indicator if you want precision.
A nicked blade tells a different story entirely. One consistent line, same location, every pass. Doesn’t vary. This one’s straightforward — rotate the knives if your planer allows it, or replace the knife if you’re at end of life. That was my situation last March, and a new set of aftermarket knives for my planer cost $48 shipped.
Most shop knives handle a few hundred board feet before they dull enough to need rotation. When all three dull equally, you notice a general drop in surface quality. When one goes significantly faster than the others — usually from running something abrasive — it leaves visible marks while the others still cut fine.
Replacing a cutterhead knife takes practice. If you’ve never done it, search YouTube for your specific planer model before touching anything. It’s mechanical and approachable once you’ve watched the process twice, but rushing it destroys expensive tooling. Aftermarket knife sets run $30–$80 depending on the machine.
Quick Prevention Habits That Keep Tracks from Coming Back
Once you’ve solved the immediate problem, four simple habits keep it from coming back. While you won’t need any special equipment or complicated procedures, you will need a handful of minutes and some consistency.
First, you should clean your feed rollers every four or five sessions — at least if you work regularly with softwoods. A two-minute wipe with mineral spirits stops buildup before it becomes a problem. I’m apparently someone who forgets this step for months at a time, and my rollers always pay for it.
Before running resinous species like pine or fir, check the rollers for existing pitch. Buildup accelerates fast on soft species. A quick visual check before loading the board saves you from discovering tracks halfway through a project you care about.
Take lighter passes on figured or cupped stock. Feeding a severely cupped board through at full depth stresses the rollers hard. Two passes at 0.05 inches instead of one pass at 0.10 inches produces cleaner results — and your rollers last longer for it.
Feed boards at a slight angle rather than dead straight. This distributes wear across a wider section of the rubber and slows down flat spot development considerably. Small adjustment. Real difference over time.
Those four habits — regular cleaning, resin awareness, light passes, and angled feeding — eliminate 90% of track problems before they ever start.


Stay in the loop
Get the latest master wood crafters updates delivered to your inbox.