What Drill Press Runout Actually Feels Like
Drill press runout has gotten complicated with all the vague forum advice and recycled YouTube tutorials flying around. I spent three months blaming my own technique — adjusting my feed rate, switching bit brands, slowing my RPMs down — before I finally figured out the real problem. The holes were coming out oversized. Half a size larger than the bit should have cut. The exit side would splinter like someone had gone at it with a chisel. And worst of all, I could actually watch the bit wobble as it spun — this tiny, stomach-turning little dance that told me something was genuinely wrong.
That’s what runout feels like. Not a textbook definition. Not a number on a chart. It’s the moment you realize the machine isn’t doing what you told it to do.
Probably should have opened with this section, honestly. What you experience in the shop matters more than any formal explanation of what runout technically is.
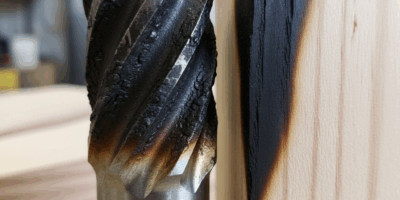
Most woodworking tolerates runout under 0.005 inches without complaint. Below that threshold, holes look clean, walls feel smooth, and you move on. Cross that line and things fall apart fast. A 0.010-inch runout on a quarter-inch bit means the cutting edge isn’t centered anymore. One side bites deep. The other barely kisses the wood. You get oversized holes, rough walls, visible wobble, and burning on entry — sometimes all four at once, which is its own special kind of frustrating.
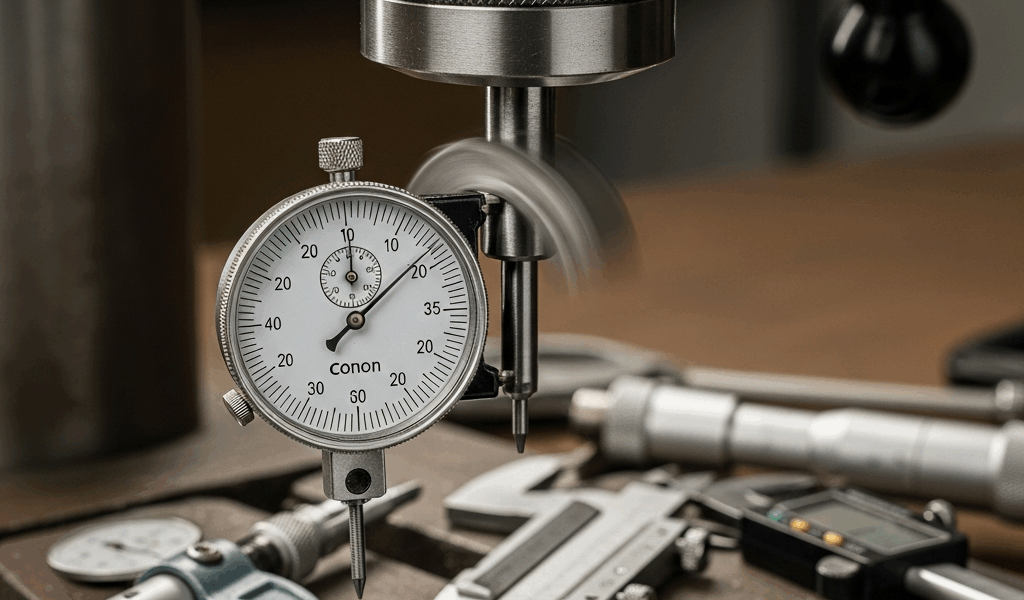
How to Measure Runout With a Dial Indicator
While you won’t need a full metrology setup, you will need a handful of basic tools — chiefly a dial indicator. The $12 one from Harbor Freight works perfectly for this job. Don’t overthink it.
Mount the indicator so the plunger touches the spindle taper — the cone-shaped section where the chuck actually seats. Lower the quill until the plunger makes contact, then spin the spindle by hand and watch the needle move. The total distance it travels from its lowest point to its highest is your TIR — total indicated runout — on the spindle taper. Write that number down. You’re hoping for under 0.002 inches here.
Next, measure the chuck bore. Remove the indicator from the chuck, then install a test mandrel or clean bit shank in its place. Position the indicator plunger against the outside of that mandrel and spin again. This tells you whether the spindle taper and chuck opening actually share the same center axis. Anything above 0.003 inches is a red flag worth taking seriously.
Finally, check the chuck jaws. Insert a test mandrel or clean rod, tighten the jaws firmly around it, and put the indicator plunger on the mandrel surface right where the jaws grip. Spin. This number tells you whether the jaws themselves are bent or worn unevenly. Above 0.005 inches and the chuck physically cannot hold bits accurately — doesn’t matter how careful your technique is.
You’re measuring three separate things because runout lives in layers. The spindle taper can be perfect while the chuck is garbage. The chuck bore can be true while the jaws are completely shot. Measuring each stage independently tells you exactly where the problem actually lives — so you’re not replacing things that don’t need replacing.
Is the Problem the Chuck or the Spindle
Here’s the diagnostic step most articles skip entirely. It changes everything.
Mark your chuck position on the spindle — a permanent marker tick on both the chuck body and the spindle casting works fine. Remove the chuck. Rotate it exactly 180 degrees. Reinstall it in that reversed orientation and measure the runout again at the jaws.
But what does this tell you? In essence, it isolates which component is actually at fault. But it’s much more than that — it turns guesswork into real diagnostic logic.
If the runout stays the same or shifts to a different location on the workpiece, the chuck is the culprit. A bad chuck shows bad runout regardless of how you orient it, because the spindle taper underneath isn’t moving. If the runout changed location but stayed the same magnitude, that’s actually progress — the spindle taper or quill is where the real problem lives.
That’s what makes this test endearing to us diagnostically-minded shop people. You’re not guessing. You’re eliminating variables one at a time.
How to Fix a Chuck With Too Much Runout
Three scenarios live here. Only one requires buying something.
Start with debris — always. Remove the chuck and look at the Jacobs taper, the cone surface where it seats against the spindle. You’ll probably see dust, shavings, or the faint brown stain of old oil that’s been sitting there for years. Clean it with a dry cloth. Clean the spindle taper too. Reseat the chuck by hand and tap it gently with a plastic mallet to fully seat it. Measure again. I’m apparently someone who ignored this step for an embarrassingly long time, and cleaning the taper works for me now while no amount of technique adjustment ever did. Don’t make my mistake.
If debris wasn’t the issue, the chuck jaws are probably worn. They’ve been tightened thousands of times. The grip surfaces wear unevenly. Eventually the chuck opens and closes fine but can’t hold anything true. First, you should replace the chuck — at least if you want holes that actually match your bit diameter. A real Jacobs chuck runs $45 to $80. It will outlast the machine.
Cheap import chucks at $15 might be the worst option, as accurate drilling requires consistent jaw alignment. That is because import quality varies wildly — some are fine, most aren’t, and you can’t tell until you’ve already installed it and measured 0.012-inch runout on a brand new chuck. Stick with Jacobs, Rohm, or Albrecht. They cost more because they actually work.
If the taper was clean and the jaws are new but runout is still bad, the chuck simply cannot hold tolerance. Some never could. Buy a replacement and move on.
When the Spindle or Quill Is the Real Culprit
Cleaned the taper. Replaced the chuck. Rotation test showed the problem stays fixed in one spot regardless of chuck orientation. The spindle or quill is the issue now.
Start by inspecting the spindle taper for dings or burrs. Look at it in decent light — a work lamp held at a low angle helps. Run your fingernail carefully across the surface. Even small burrs will prevent the chuck from seating properly and introduce runout. A brass punch tapped gently from the underside of the taper can sometimes knock small dings out. Brass won’t damage the taper the way a steel punch would. Deep scratches, though — those don’t come out. You’re stuck with them.
Worn quill bearings are the other possibility. The quill rides on bearings, and years of use wear them out. Runout gets progressively worse as the bearings get sloppier. This is honest mechanical wear. It happens to every press eventually. Replacing the bearings is a full disassembly job — doable if you’re mechanically comfortable with it, but on an older machine worth $300, the labor calculation doesn’t always work out.
So, without further ado, here’s the actual decision tree: Chuck runout moves when you rotate the chuck — buy a new Jacobs or Rohm chuck, $45 to $80. Spindle taper has a ding — try a brass punch, accept the scratch if it doesn’t budge. Quill bearings feel loose — weigh what the repair costs against what the machine is worth.
Runout stops being mysterious once you start measuring it. You’ll find where the problem lives. Fix it. Go back to making holes that actually look like holes.


Stay in the loop
Get the latest master wood crafters updates delivered to your inbox.