What Actually Happens During Table Saw Kickback
Table saw kickback has gotten complicated with all the conflicting advice flying around. As someone who’s stood at a table saw with shaking hands after a near-miss, I learned everything there is to know about what causes it and how to stop it. Today, I will share it all with you.
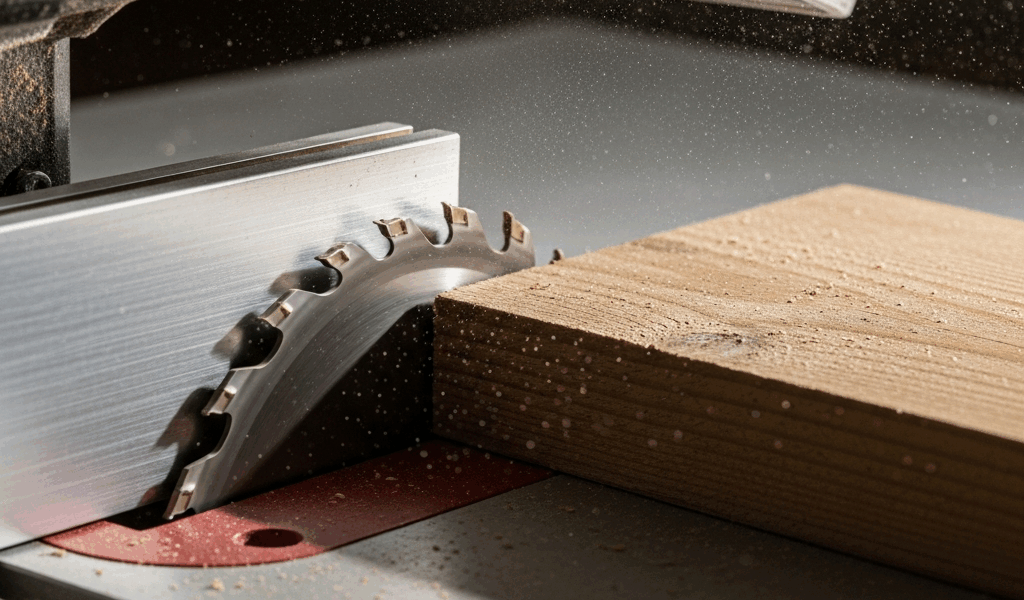
The blade grabs the wood. That’s the core event. Spinning teeth catch fiber at the wrong angle, jam for a fraction of a second, and redirect all that rotational energy into a single violent direction. The wood becomes a projectile. Fast.
Here’s the distinction most articles skip entirely: kickback actually happens two different ways. First, the kerf closes behind the blade and pinches the rear teeth — the wood barely moves, but the saw bogs down and you smell something burning. Second, the wood lifts and shoots backward toward you, or climbs the blade completely. Same blade, same basic physics, completely different operator experience and completely different root causes.
Understanding which one is happening in your shop changes everything about how you fix it. A riving knife solves one problem. Fence alignment fixes another. Blade selection handles a third. We’ll walk through all three in real sequence.
Cause 1 — Wood Pinching the Blade After the Cut
This is the most common scenario. And honestly — it’s not your fault. I spent about three years convinced I was feeding boards wrong before I understood what was actually going on.
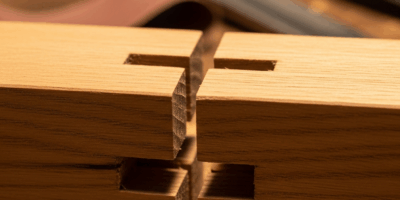
Internal stress in the lumber is the real culprit. Wood isn’t uniform. Growth rings, moisture gradients, how the tree got milled — all of it creates tension locked inside the board. When you slice through it, you’re separating those stressed layers. The kerf wants to close back up.
As the blade passes through, the rear teeth sit in a kerf that’s getting narrower by the second. The wood pinches the blade. You’ll recognize this immediately: the saw bogs down mid-cut, a burning smell rises from the table, the board feels like it’s fighting you. Some people describe it as the blade “grabbing.” That’s exactly what it is.
The fix has three parts:
- Install a riving knife or splitter. Most table saws ship with a removable splitter attached to the blade guard assembly. Use it every single time on through-cuts — at least if you want to avoid this exact problem. The splitter sits directly behind the blade and holds the kerf open. A riving knife, the thinner permanently mounted version common on European saws, is superior because it actually tracks with blade height. If your saw has neither, get an aftermarket splitter. The Shark Fin from Microjig runs about $90. SawStop makes their own splitter system too. This single addition prevents roughly 80 percent of pinching incidents.
- Never remove the blade guard assembly for rip cuts. I see this constantly. Someone gets frustrated, yanks the guard and splitter off for “just this one cut,” and suddenly has zero protection against pinching. The guard isn’t just about hand safety in the obvious sense — it’s the structural element keeping the splitter perpendicular to the blade.
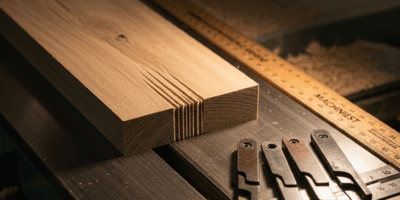
- Identify tension-prone lumber before you start cutting. Bowed, cupped, or twisted boards are stress relief waiting to happen. Hold a suspect board up to light and look at the growth rings end-grain. Rings that curve sharply from one side to the other are loaded with tension. Quarter-sawn boards — rings nearly perpendicular to the face — are much safer to rip. If you’re uncertain about a board, test-rip a small section on scrap with a similar stress profile first.
Probably should have opened with this section, honestly. Most woodworkers solve their kickback problem entirely by addressing point one alone.
Cause 2 — Feeding Wood Against the Fence at the Wrong Angle
The second scenario: your hand position or the fence itself is slightly misaligned, the wood drifts into contact with the rear teeth of the blade, and the blade throws it. Hard.
But what is rear-tooth contact, exactly? In essence, it’s when wood touches the part of the blade that’s traveling upward and backward rather than downward and forward. But it’s much more than that — it’s the mechanism behind the most violent kickback incidents. The front teeth cut forward and downward. The rear teeth exit upward. Wood touching those rear teeth gets accelerated backward with enormous force. That’s what makes this particular cause so dangerous compared to simple pinching.
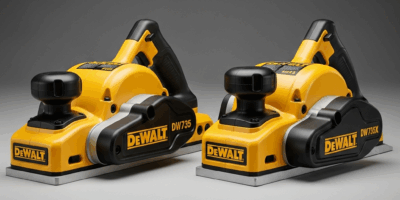
Check your fence-to-blade parallelism first. Production table saws — your Dewalt DWE7491RS, your Bosch 4100-09 — can shift fence mounting over time. Here’s the diagnostic method:
- Raise the blade to full height.
- Measure from the blade’s front tooth to the fence at the front of the table. Use a metal ruler, measuring to the outermost point of a tooth at the top of its arc.
- Slide the ruler back and measure at the rear of the table, in line with the blade’s back edge.
- The two measurements should match within 1/32 inch. If the rear measurement is larger, the fence angles away from the blade — that’s safe. If smaller, the fence angles toward the blade — that’s dangerous, and wood will drift right into the back teeth.
Most fences drift toward the blade. It’s essentially a manufacturer default — saves money on precision tolerances during production. Adjust your fence accordingly. If adjustment isn’t accessible on your model, shim it with thin metal shim stock tucked behind the fence rail.
Then fix your hand position. Feed stock straight into the blade. Straight. Not at a slight angle, not drifting toward the fence halfway through the cut. Use push sticks or a push block — a flat board with a handle, not your bare hand. Your hand should never come within 6 inches of the blade. If you’re naturally angling your body or your feed motion, you’re drifting wood into exactly the wrong place.
Cause 3 — Using the Wrong Blade for the Cut
Blade selection matters more than most people realize. A dull blade, a blade with too many teeth for thick stock, or a ripping blade used for crosscutting — all of these increase the chance of grabbing rather than cutting cleanly. I’m apparently someone who ran a rip blade for crosscutting for a full year, and switching to a combination blade fixed a problem I didn’t even fully understand I had. Don’t make my mistake.
A blade with fewer teeth, larger gullets, and the right hook angle removes waste aggressively. Sawdust doesn’t jam in the kerf. A dull blade or a dense-tooth finish blade doesn’t clear waste fast enough. The blade slows, stalls, and grabs. That’s the whole mechanism.
For ripping — cutting parallel to grain:
- Use a 24-tooth to 40-tooth rip blade
- Look for a 20–25-degree hook angle on the tooth face
- Alternate top bevel tooth pattern is standard for rip work
- A 10-inch Freud ripping blade runs $35–50 and holds up for years
For crosscutting — cutting perpendicular to grain:
- Use a 60-tooth to 80-tooth crosscut or combination blade
- More teeth means cleaner exit and less splintering on the bottom face
- Hook angle should sit between 5–15 degrees, much shallower than rip blades
- A 10-inch Makita 60-tooth carbide blade ($25–35) handles ripping, crosscutting, and plywood without much compromise
Replace your blade when it starts producing sawdust finer than sand, when exit surfaces splinter consistently, or when you need more than light pressure to feed the stock. Sharpening costs $12–18 per blade versus $20–60 for new. Worth doing once. After the second sharpening, pitch buildup makes restoration basically impossible — just buy new at that point.
Shop Setup Changes That Prevent Kickback Long Term
Beyond diagnosing one specific incident, permanent equipment changes and consistent habits eliminate kickback almost entirely. So, without further ado, let’s dive in.
Install a riving knife if your saw doesn’t have one. Most older cabinet saws and contractor saws ship with a removable splitter. Aftermarket riving knives that track blade height automatically run $60–150 installed — SawStop includes one standard on every model. If you own a Jet, Grizzly, or Powermatic, the aftermarket fits. This is not optional equipment.
Add anti-kickback pawls. These spring-loaded arms hang above the stock and dig into the top surface if the wood tries to move backward. They won’t stop a full-force kickback, but they slow the wood enough to break your grip and give you time to step back. A pawl system runs $40–80 depending on brand.
Support long boards. Any rip cut longer than 4 feet needs outfeed support — at least if you want the board to stay stable through the full cut. A roller stand behind the saw prevents tipping and reduces binding mid-cut. A Dewalt roller stand costs about $80. A plywood outfeed table costs maybe $30 in materials. Either works.
Build stance habit. Stand to the side of the blade, never directly behind it. Both feet on the ground. Stay relaxed so you can step back fast if the saw bogs or the wood accelerates. Never lean over the saw. Never reach across the blade.
Kickback is almost always preventable. Once you understand the three actual mechanics — pinching, drift, and blade mismatch — you have a real map to working safely. That’s what makes this knowledge endearing to us woodworkers who’d rather spend our time building things than getting hurt. Fix the root causes and the fear goes with them.

Stay in the loop
Get the latest master wood crafters updates delivered to your inbox.