Check Your Blade First
As someone who spent three years convinced my circular saw was defective, I learned everything there is to know about blade condition — and why it’s always where you start when cuts go crooked. Every single wavy, wandering line I produced during that embarrassing stretch traced back to one thing. I was running teeth so worn down they couldn’t bite into wood anymore. That was it. Three years of frustration over a $35 fix.
This article includes affiliate links. We may earn a commission at no extra cost to you.
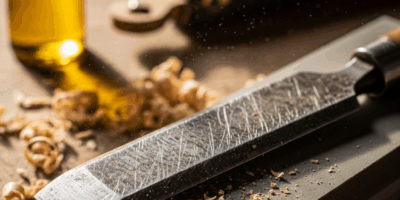
A dull blade doesn’t cut. It deflects. The teeth can’t engage cleanly, so the saw wanders sideways instead of tracking straight. The motor strains, heat builds, the blade bends slightly under pressure — and that micro-deflection multiplies over the full length of your cut. What should be a crisp line becomes a curve that makes you question everything you know about woodworking.
The easiest test is just looking at the thing. Hold your blade under bright light and check the teeth for sharp points. Angle a flashlight across the tips. Rounded or flat edges? That’s your problem right there. Still not sure? Drop the blade into a piece of scrap. A sharp blade glides through with almost no pressure. A dull one makes you push, whines at a pitch that sets your teeth on edge, and wanders the whole way. You’ll know.
Dull Blade vs. Budget Blade
Here’s the distinction that took me way too long to figure out. Sometimes a blade cuts poorly not because it’s worn — but because it was never good to begin with. An $8 blade from the clearance bin won’t cut as straight as a $35 Diablo D0724A, period. Budget blades use thicker steel that deflects more easily. The teeth come inconsistently sharpened from the factory. You’re fighting physics from the first rotation and wondering why everything looks crooked.
Tooth count matters too, and mismatching it to your application is its own form of sabotage. For rip cuts running parallel to the grain in hardwood, I run a 24-tooth blade. Crosscuts get 60 teeth. Plywood or laminate where tearout is a concern — 80 teeth, standard. Run a 24-tooth blade on a crosscut and you’ll get torn edges and drift that has nothing to do with your technique or your fence. That’s not dullness. That’s mismatch.
Replacement vs. Resharpening
You can sharpen blades. Most people don’t bother. I’ve sent blades out for professional sharpening exactly once — $12 per blade, one week turnaround. By that math, a fresh mid-range blade makes more sense almost every time. Freud, Makita, and DeWalt all make solid options in the $25–$40 range that’ll survive hundreds of cuts before sharpening becomes a real conversation.
Visibly chipped teeth or anything missing? Replace it immediately. Don’t make my mistake of trying to compensate with technique. You’ll produce garbage cuts and risk a kickback situation that’s genuinely unsafe. A fresh blade is cheap. An ER visit isn’t.
Fence and Guide Alignment
Frustrated by inconsistent results on a cabinet project, I spent two full hours adjusting everything I could think of before finally checking whether my fence was actually square to the blade. It wasn’t. That was the problem all along — obvious in hindsight, invisible in the moment.
Most circular saws ship with a built-in fence. Most of those fences are not perfectly square. Cheaper models especially, or saws that’ve taken a few hard knocks on a jobsite over the years. Even 2 or 3 degrees of misalignment means your blade is tilted relative to the cut line from the moment you start. Technique won’t save you. A perfect cut line won’t save you. The geometry is already wrong before you pull the trigger.
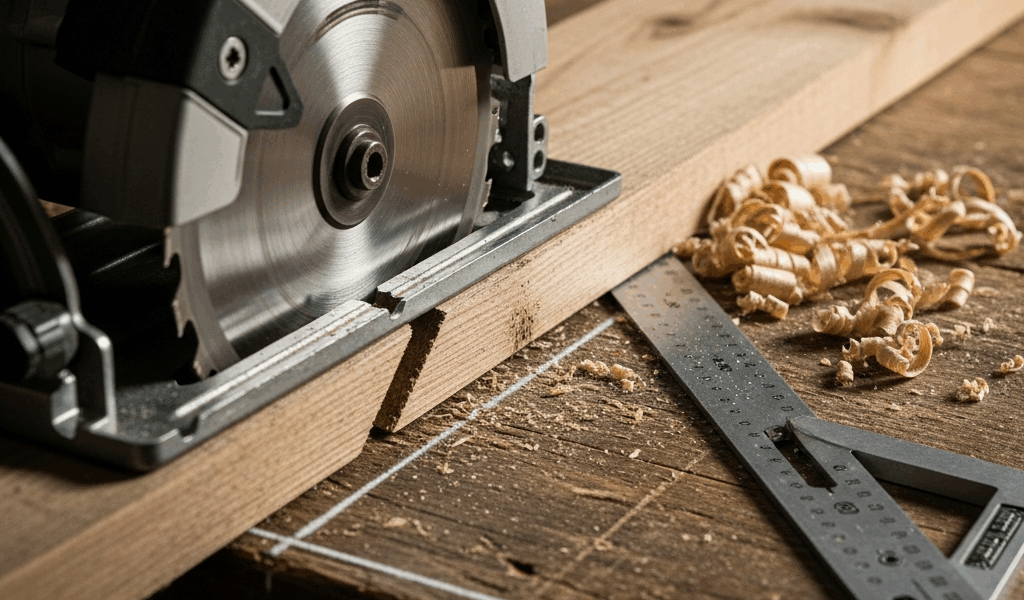
Testing Fence Alignment with a Speed Square
A speed square costs about $8. It solves this in ninety seconds. Unplug the saw first — always. Hold the square flat against the blade along its length and check whether it sits flush against the fence. Any gap between the square and the fence means misalignment. That gap is the reason your cuts drift.
Some saws let you correct this by loosening screws and nudging the base into position. Others don’t offer any adjustment at all. If yours falls into that second category — well, you’ve just identified your problem. And you’ve also identified why the next technique exists.
The Straightedge Guide Clamp Technique
Rather than fighting a fence that won’t cooperate, I started clamping a straightedge directly to the workpiece. I use a 48-inch aluminum level — guaranteed straight, already in my shop, costs nothing extra. It changed my results immediately. Honestly should have done it years earlier.
The setup is simple. Mark your cut line with a pencil. Clamp the straightedge parallel to that line, positioned so the saw’s baseplate rides along it without binding. The baseplate itself becomes the fence now — running against the straightedge instead of relying on the saw’s built-in guide at all. The saw’s fence is completely removed from the equation. Dead-straight cuts every time, regardless of whether that fence is square or not.
Your Technique Might Be the Problem
I once burned forty minutes adjusting my fence when the real issue was that I was pushing the saw like it personally owed me money. Probably should have opened with this section, honestly.
Technique causes crooked cuts more often than hardware failure. Three specific habits are responsible for most of it. Pushing too fast — the blade deflects backward, creates an angle, and suddenly you’re cutting sideways. Not supporting the workpiece — if anything can shift, it will, and the saw follows it. And standing wrong, which is subtler but just as destructive.
Pushing Speed and Feed Rate
The saw should cut at its own pace. Your job isn’t to force it forward — it’s to guide it. If you’re leaning into the cut or the motor sounds like it’s straining, slow down. A sharp blade in softwood moves forward with almost no resistance. You’re essentially just keeping the saw on the line while gravity and blade rotation handle the actual work.
Hardwoods like oak or maple take more effort — sure. But never “lean on it with your full body weight” effort. If you’re doing that, either the blade is dull or you’re using the wrong tool for the application. The saw is telling you something. Listen to it.
Workpiece Support and Positioning
Both sides of the cut need support. If the workpiece is hanging off the edge of a sawhorse, it drops as the blade approaches — and that movement causes the blade to cut at an angle. Clamp everything down or set up sawhorse brackets at roughly equal heights on both sides. The surface needs to be stable enough that moderate hand pressure doesn’t move anything.
For long rip cuts, I run outfeed support on the far end. A second sawhorse positioned behind the cut prevents the free piece from dropping, which would cause binding and steer the blade sideways right at the end. That last 12 inches of a cut is where most people lose it.
Stance and Body Position
Stand 90 degrees to the cut line — not directly behind the saw. Feet shoulder-width apart, positioned so you can travel the full cut length without twisting your torso. Twisting torques the saw sideways. Shoulders square to the fence line. If your body rotates mid-cut, the blade follows.
Keep your hands relaxed. A death grip becomes steering pressure, and steering pressure becomes drift. The saw should feel like something you’re guiding, not something you’re wrestling. Tension in your hands telegraphs directly into the cut. If you’re fighting it, something else is already wrong.
The Speed Square Trick for Perfect Cuts
This is the simplest method I know for crosscuts, and I use it constantly for one-off work where rigging up a full track system isn’t worth the setup time.
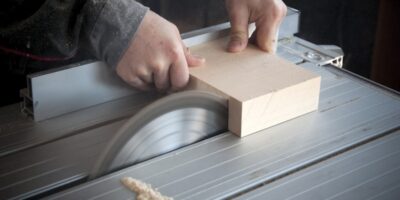
Clamp a speed square perpendicular to the workpiece edge, right along your cut line. The square becomes a fence. The saw’s baseplate rides against it. Since the square is guaranteed 90 degrees, your crosscut is guaranteed square — every single time, with zero alignment checking required.
You want a 7-inch speed square for this. About $10 at any hardware store. Wide edge against the workpiece edge, saw baseplate butted against the square’s upright face, clamp secured so nothing shifts mid-cut. Make the cut at a normal, controlled pace. That’s the whole method.
But what is the real advantage here? In essence, it’s an external reference that doesn’t depend on your saw’s manufacturing tolerances at all. But it’s much more than that — you’re permanently bypassing whatever misalignment exists in your built-in fence by substituting a verified-straight object instead. For repetitive cuts to identical lengths, a miter saw still wins on speed. For occasional work where you just need a clean, straight edge? This is reliable, fast, and requires nothing you don’t already own.
When to Use a Track Saw Instead
If straight cuts are a regular part of your work, a track saw is the real answer — and I’m apparently a slow learner because I waited years longer than I should have to buy one. The Makita SP6000J1 runs about $299 and works for me while the cheap circular-saw-plus-clamp-straightedge approach never quite gave me the consistency I needed on furniture work. Don’t make my mistake.
A track saw — sometimes called a plunge saw — is essentially a circular saw mounted above a precision-milled rail. You clamp the rail to the workpiece and the saw glides along it. The geometry is controlled entirely by the rail. Misalignment isn’t possible because the rail is what determines the cut path, not the saw’s baseplate or fence.
Basic track saws start around $150–$300. The Festool TS 55 runs $400 and is the gold standard in professional cabinet shops and furniture studios. For frequent woodworking, the math on buying a decent track saw versus fighting a circular saw for months is not complicated. It pays for itself in saved time and eliminated frustration faster than you’d expect.
The Kreg Rip-Cut — a straightedge guide clamp that runs $20–$40 — sits between the DIY straightedge method and a full track system. It clamps to the workpiece and guides standard circular saws without the alignment guesswork. Slower than a track saw, faster than rigging up squares and clamps every single time. Worth knowing about if the full track setup isn’t in the budget yet.
That’s what makes the track saw endearing to us woodworkers — consistent, square, repeatable cuts that require zero technique adjustment. The tool does the work instead of you compensating for it.
So, without further ado, here’s the honest summary: a dull blade makes any saw cut crooked. A misaligned fence does the same. Bad technique stacks on top of both. Start with the blade — sharpen or replace it. Check the fence with a speed square. Fix your technique — slow down, support the material, stand square. For occasional crosscuts, use the speed square trick. For regular work, buy the track saw. One of those steps will permanently eliminate whatever crooked-cut problem is currently making you miserable.


Stay in the loop
Get the latest master wood crafters updates delivered to your inbox.