Through tenons have gotten complicated with all the woodworking show demonstrations, Instagram beauty shots, and forum arguments about flush versus proud projections flying around. As someone who has cut through tenons in everything from workbench stretchers to dining table bases, I learned everything there is to know about making this joint look as good as it functions. Today, I will share it all with you.
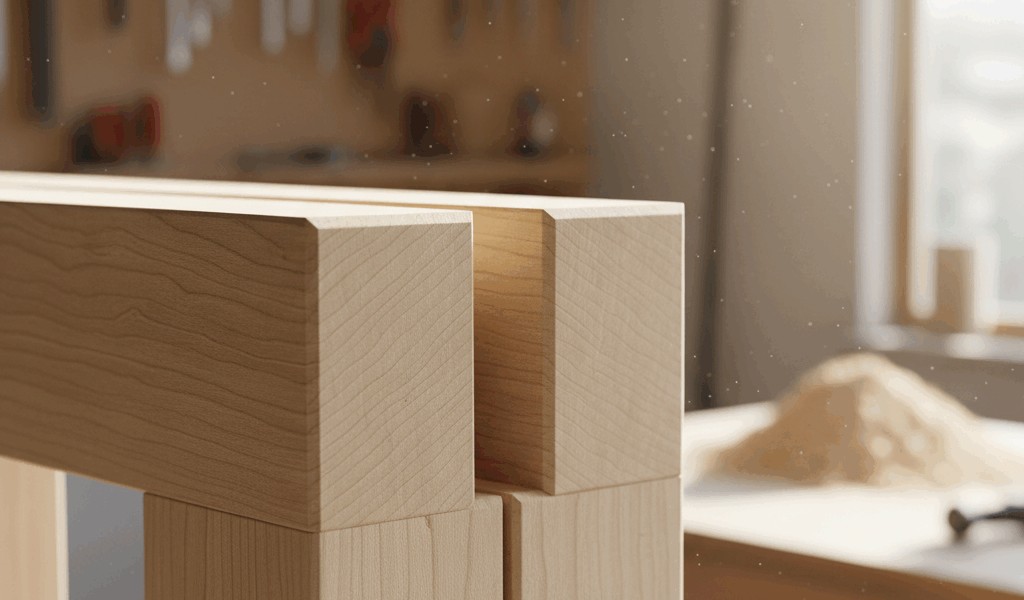
Through tenons announce themselves. Unlike their hidden counterparts, they extend completely through the mortised piece, showing end grain on the opposite face. When executed perfectly, they demonstrate mastery. When botched, they advertise inexperience. There’s no hiding your work here, which is exactly why this joint separates serious woodworkers from hobbyists.
Why Through Tenons

Beyond aesthetics, through tenons offer practical advantages that justify the extra precision they demand. You can visually confirm the tenon reaches full depth. You can wedge the tenon from the exposed end, creating mechanical lock that doesn’t rely on glue alone. And you can replace the tenon piece if it ever breaks, since the joint can be driven apart — something blind tenons don’t allow.
That’s what makes through tenons endearing to us Arts and Crafts furniture builders — traditional pieces celebrated the joinery rather than hiding it, making through tenons a design feature that communicates quality construction at a glance.
Layout Precision
The mortise width should equal one-third of the mortised piece thickness. This provides adequate cheek strength while maintaining a substantial tenon. Narrower tenons weaken the joint; wider ones leave fragile mortise walls that can crack during assembly or under load.
Mark the tenon length from the actual mortised piece, not from a measurement. Wood thickness varies from board to board, and you want the tenon to project a consistent amount regardless of any variation in your stock. Measure from reality, not from plans.
Use a marking gauge for all parallel lines. Set it once and mark all related pieces to ensure consistency across the project. A knife line beats a pencil line for precision because it creates a physical registration point for your saw rather than a fuzzy graphite mark.
Cutting Clean Shoulders
Probably should have led with this section, honestly — the shoulder tells the entire story of your skill level. Gaps at the shoulder scream poor workmanship louder than any other flaw in the joint. Start by establishing a deep knife line all around the shoulder position. This severs the surface fibers and prevents tearout when you cut.
Create a small V-groove on the waste side of your knife line by paring toward it with a chisel. This groove guides your saw, preventing it from wandering onto the show surface. Saw carefully against the knife wall, letting the groove keep you honest through the entire cut.
For hand sawing, use a fine-toothed backsaw and let the weight of the saw do the cutting. Forcing the saw causes it to wander — and a wandering saw at the shoulder line means starting over or living with a gap. Saw all four shoulders before touching the cheeks.
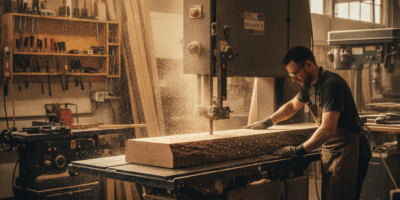
Cheek Cuts
The tenon cheeks require dead-flat surfaces. Any hollow or hump reduces glue surface and creates visible gaps when the joint goes together. On the table saw, use a tenoning jig that holds the workpiece vertically. Make the cut in a single pass if possible to avoid step marks.
By hand, establish the cheek cuts with a rip saw, splitting the waste from the tenon. Stay well off your line initially — you can always remove more wood but you can’t put it back. Pare to final dimension with a wide chisel or shoulder plane, checking flatness with a reliable straight edge after every few passes.
Mortise Execution
A through mortise must be clean on both faces since both will be visible. The entry side gets cut normally, but the exit side needs protection from blowout. Drill or chop halfway through from each face, meeting in the middle. This approach takes longer but prevents the ugly breakout that ruins exposed joints.
Mark identical layouts on both faces using the same gauge settings. Any misalignment between faces creates a twisted mortise that won’t accept a straight tenon. Check alignment frequently as you work from each side.
Final Fitting
Pare the tenon cheeks incrementally until the joint goes together with firm hand pressure. Driving a too-tight through tenon risks splitting the mortised piece because the wood has nowhere to flex — unlike a blind mortise where the closed end provides compression room.
The tenon should project 1/16 to 1/8 inch beyond the mortised piece face. After glue cures, plane this flush or leave it slightly proud as a design element. Either approach is historically correct and both look professional when executed cleanly.
Sand or plane the exposed end grain after the joint is assembled and cured. This ensures a perfectly flush surface that accepts finish evenly. Through tenons done right become the focal point of any piece they grace — the detail that separates handmade furniture from mass production.


Stay in the loop
Get the latest master wood crafters updates delivered to your inbox.