Why Pocket Hole Joints Fail in the First Place
Pocket hole joinery has gotten complicated with all the conflicting advice flying around. As someone who has spent the last five years troubleshooting failed joints in my own shop — and helping friends redo work they were convinced was finished — I learned everything there is to know about why these things fall apart. Today, I will share it all with you.
Almost every failure traces back to one of three things: wrong screw length for your material thickness, the depth collar set incorrectly, or assembling the joint without clamps holding everything flush. That’s it. Three variables.
Most woodworkers skip the owner’s manual. I know I did. That’s where the trouble starts. A Kreg jig is genuinely simple to operate — but simple doesn’t mean forgiving. The tool performs exactly as designed. It’s the operator who needs to match the settings to the wood thickness and joint type. Once you actually internalize those three variables, pocket hole failures become almost impossible.
Screw Is Stripping Out or Won’t Bite
Stripped pocket holes are the most common complaint I hear. You drive the screw in, feel resistance, keep pushing, and suddenly it’s spinning freely without pulling the joint together. At that point, that hole is done.
Start with pilot hole depth. If your depth collar isn’t set correctly, the pocket itself ends up too shallow or too deep. Too shallow, and the screw bottoms out before the threads can grab the receiving board. Too deep, and the threads start pulling before they’ve gripped anything solid. For ¾-inch material on a standard Kreg Pocket-Hole Jig HD, the depth collar should sit at roughly the 10 o’clock position when viewed from above. For ½-inch stock, move it to 12 o’clock. For 1½-inch timber, back it to 8 o’clock. These aren’t arbitrary numbers — they control exactly how deep the spiral flutes cut into the wood.
Then there’s screw type. This is where most guides get frustratingly vague. Kreg makes coarse-thread screws for softwoods and plywood, fine-thread for hardwoods. The difference matters tremendously. Coarse threads bite fast in pine or spruce but shear right out of oak or maple. Fine threads take more turns to seat but won’t strip walnut or red oak. I’m apparently a slow learner on this one, and coarse-thread screws in softwoods work perfectly for me while fine threads in hardwoods never gave me problems — but mixing those up? Disaster. I used coarse-thread screws in maple once and wasted an entire panel face. Don’t make my mistake.
Speed kills pocket hole joints, honestly. Most people grab a cordless drill running at 2,000 RPM and wonder why everything strips. Slow down. Kreg recommends 500 RPM or lower when driving pocket hole screws. Your DeWalt DCD791 or Makita XFD131 probably has two speeds — use the low one. A corded drill at half throttle or a dedicated screw gun gives you far more control than cranking the trigger. Apply steady pressure. Let the screw do the work.
Joint Is Pulling Apart or Won’t Stay Flush
Probably should have opened with this section, honestly. This is the second-most frustrating problem — you clamp, drive the screw, release the clamp, and the boards spring apart leaving a visible gap.
Clamping technique determines everything here. Face clamps work when joining two boards edge-to-edge. Right-angle clamps — or dedicated 90-degree corner clamps — are essential when joining boards perpendicular to each other. A cabinet side to a back panel, for instance. A face clamp pulls parallel to the face grain. It physically cannot hold a corner joint tight no matter how hard you crank it. I’ve watched people use three face clamps on a corner joint and still end up with gaps. Switch to a corner clamp, tighten it once, problem solved. Bessey and Festool both make reliable right-angle clamps — they run $25 to $50 — and they save way more in material and frustration than they cost.
But what is a pocket hole joint’s real weakness? In essence, it’s a mechanical fastener without a bond. But it’s much more than that. End-grain-to-face-grain connections absolutely need glue. A shelf pocket-holed into the inside face of a cabinet side — that’s end grain meeting face grain. Without glue, that joint loosens over time as the wood moves seasonally. Add a small bead of Titebond II in the pocket before driving the screw. It costs nothing and turns a mechanical connection into a structural one.
Wood movement is real. Building a 36-inch-wide panel top? Don’t glue the pocket holes. The wood will move with humidity changes, and a glued pocket hole joint won’t accommodate that. The boards will cup or the joint will crack. Leave glue out in this scenario and let the screws do their mechanical job alone. Counterintuitive — but necessary on wider assemblies. That’s what makes understanding wood movement so endearing to us woodworkers.
Holes Are Misaligned or Blowing Out the Other Side
Misaligned holes usually come from one source: depth collar set wrong for the material thickness. When the collar sits too shallow, the jig doesn’t seat fully against the board face. It rocks slightly during drilling, and the hole comes out off-angle or positioned wrong relative to your layout marks.
Walk through the collar adjustment deliberately. For ½-inch material, the collar should rest firmly against the board face — zero gap. Same principle for ¾-inch. Same for 1½-inch timber. Firm contact. If the collar floats or rocks even slightly, reset it. A half-turn on the adjustment collar changes depth significantly. Take it slow and test on scrap first.
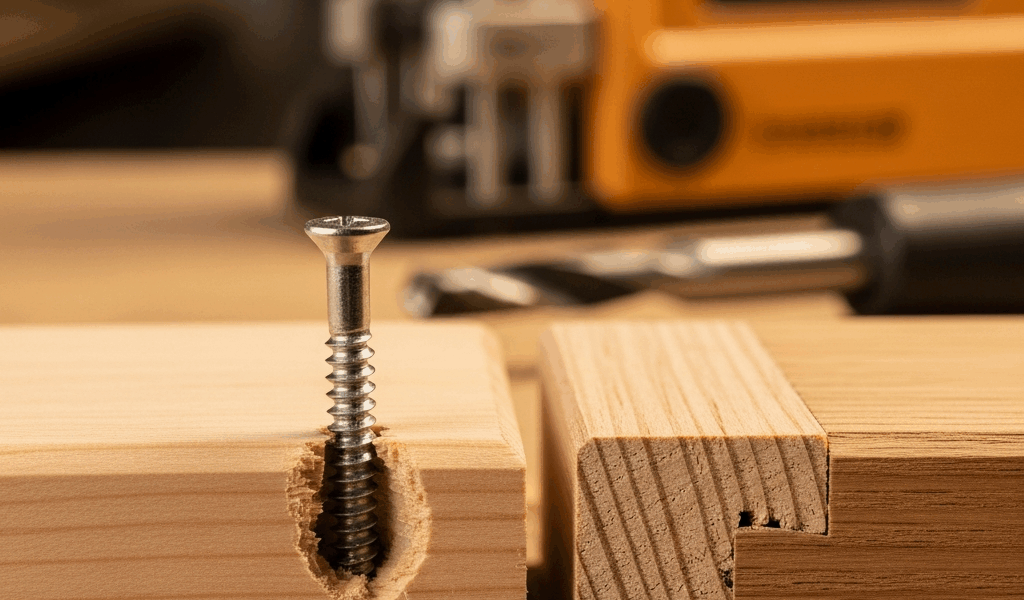
Blowout on the exit side happens when the screw punches through the receiving board instead of seating inside it. Almost always a screw-length problem. The screw should bury its head fully below the pocket surface — but the tip should stop inside the receiving board without breaking through. A screw that’s just ½-inch too long will punch through every time. Measure your material thickness, cross-reference the Kreg screw length chart — it’s a single page, printed and taped inside my cabinet door — and order the right size. No shortcuts here.
One beginner mistake I see constantly: drilling into the wrong face. You mark which board gets the pocket holes, then someone — often past-me — flips it around mid-assembly. Now you’re drilling into back faces instead of joining faces. Check your layout twice. I use a pencil X on the face that receives the pocket holes. Simple, obvious, and I still almost mess it up sometimes.
Quick Reference — Common Fixes by Problem
- Screw strips in the pocket hole — Check depth collar position for your material thickness, verify you’re using the correct thread type (coarse for softwood, fine for hardwood), reduce drill speed to 500 RPM or lower.
- Joint pulls apart after assembly — Use a corner clamp for perpendicular joints — not a face clamp — add glue for end-grain connections, skip glue on wide panels to allow wood movement.
- Holes come out misaligned — Seat the depth collar firmly against the board face, check for jig rocking during drilling, reset the collar and redrill test holes in scrap before touching finished material.
- Screw blows through the receiving board — Verify screw length against material thickness using the Kreg chart, confirm you have the correct length for the application before drilling anything.
- Pilot hole too shallow or too deep — Adjust the depth collar in small increments and test on scrap wood every time before drilling into finished material.


Stay in the loop
Get the latest master wood crafters updates delivered to your inbox.