Woodshop Layout: Maximizing Efficiency and Safety
Setting up a woodshop can be an exciting yet challenging process. Whether you’re a hobbyist or a professional, a well-organized workspace is key to maximizing efficiency and safety. Here are several critical aspects of woodshop layout that you need to consider.
Determining Your Workflow
Understanding your workflow is the first step. Think about the typical sequence of operations in your projects. This usually starts with raw material storage and rough cutting, then moves to precise cutting, assembly, and finishing. Arrange your tools and equipment so that you can move through these stages logically and without unnecessary backtracking.
Space Utilization
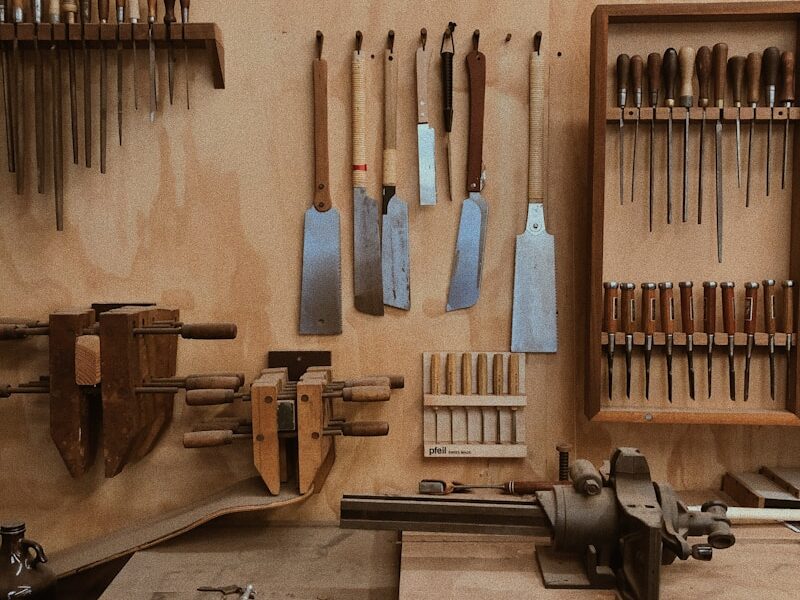
Effective space utilization is crucial. Measure your space and plan your layout carefully. Try to position your central workbench towards the middle of the shop. This provides easy access from all sides. Shelving and storage racks should line the walls to keep the floor space clear. Use the ceiling for stored items you use less frequently. Pegboards can keep frequently used tools within arm’s reach and visible.
Tool Placement
Your stationary tools, like table saws, planers, and drill presses, should be positioned thoughtfully. Table saws often serve as the centerpiece of a woodshop. Place yours to allow for ample infeed and outfeed space. Consider stationing it near the middle of the room to provide flexibility. Band saws and scroll saws can be placed against walls since they require less space. Sanders and miter saws need enough room for long pieces. Mobile stands or locking casters on tools allow you to move them as needed.
Dust Collection
Dust collection is an essential component of woodshop layout. Plan a central dust collection system early. Position the dust collector near tools that generate the most dust and chips, like table saws and planers. Use blast gates to control suction where needed. Overhead or underfloor ductwork can help keep hoses out of the way.
Electrical Layout
A woodshop demands a reliable electrical system. Plan for enough outlets. Some machines may require 240V outlets, so account for these special requirements. Overhead retractable reels for power cords can keep the floor clear and prevent tripping hazards. Ensure your electrical panel has room for expansion as you add more tools.
Lighting
Good lighting enhances safety and precision. Aim for both overhead lighting and task lighting. LED lights are energy-efficient and provide bright, clear illumination. Position additional lights over workbenches and machine areas. Natural light is ideal, so utilize windows and skylights where possible.
Workbench Design
Your workbench is the heart of your woodshop. Opt for a solid, stable design. Consider including built-in storage underneath. A vises and dog holes will improve clamping options. A large, flat surface made from dense hardwood and plenty of workspace around the workbench is ideal. Don’t forget to add padding to the floor around areas where you’ll stand for long periods.
Storage Solutions
The right storage is crucial for maintaining an organized and efficient woodshop. Incorporate drawers, cabinets, and shelves into your layout. A mix of open and closed storage can accommodate both frequently used tools and bulkier items. Rolling carts provide flexibility and can be moved to where they’re needed. Label everything clearly for quick access.
Safety Measures
Safety should be integrated into every aspect of your woodshop layout. Ensure fire extinguishers are accessible. Install first aid kits in easily reachable locations. Use non-slip mats to prevent falls. Clearly mark emergency shut-offs, and ensure all equipment has necessary safety guards. Regularly inspect and maintain your tools to prevent accidents.
Ventilation
Proper ventilation is often overlooked but crucial. Good air exchange removes dust and fumes. Exhaust fans can be installed in walls or ceilings. If you use finishing materials or solvents, make sure these areas are well-ventilated. Air filters and purifiers can help keep the air quality high.
Utility Placement
Plan the placement of utilities such as water, heat, and air. A sink can be incredibly useful for cleaning brushes, hands, and small parts. In cold climates, a reliable heating system is necessary to maintain comfort and wood stability. Compressed air lines can be useful for cleaning and operating pneumatic tools. Position these utilities for easy access without cluttering the workspace.
Material Handling
Think through how you’ll handle raw materials and finished projects. Ensure you have adequate space for both short-term and long-term storage. Use carts and dollies for moving heavy or large pieces. A clear path from the entrance to the primary tool areas will help streamline your process and avoid congestion.
Finishing Area
Your finishing area should be separate from the main woodworking area to minimize dust contamination. It should have good lighting and ventilation. Storage for finishing supplies needs to be organized and easily accessible. Disposable surface coverings can help protect your work surfaces and create a clean area for finishing tasks.
Layout Flexibility
Flexibility in your layout can adapt to changing needs. Consider modular setups where possible. Tools on wheels and easily reconfigurable workspaces can grow or shift as your projects evolve. Regularly reassess the efficiency of your layout and make adjustments to improve workflow.
Incorporating Technology
Integrate technology to streamline operations. Computer-aided design (CAD) stations can enhance planning accuracy. Digital calipers and measuring devices can improve precision. Keep a computer or tablet handy for looking up design plans, reference materials, or instructional videos. Ensure you have suitable power and data connections for all your tech needs.
Ergonomics
Ergonomics should not be neglected. Adjust the height of workbenches and frequently used tools to reduce strain. Anti-fatigue mats can provide cushioning for prolonged standing. Optimize tool storage to minimize bending and reaching. Frequent breaks and proper posture are essential for long-term health and productivity.
Personalization
Your woodshop should reflect your personal preferences. Arrange it in a way that makes you comfortable and productive. Personal touches like artwork or a favorite chair can make the space more inviting. Customizing your setup can boost both workflow efficiency and personal satisfaction.
“`
Recommended Woodworking Tools
HURRICANE 4-Piece Wood Chisel Set – $13.99
CR-V steel beveled edge blades for precision carving.
GREBSTK 4-Piece Wood Chisel Set – $13.98
Sharp bevel edge bench chisels for woodworking.
As an Amazon Associate, we earn from qualifying purchases.


Subscribe for Updates
Get the latest articles delivered to your inbox.
We respect your privacy. Unsubscribe anytime.