
Reading wood grain has gotten complicated with all the woodworking forums, tool review channels, and quick-tip videos flying around. As someone who has been reading grain patterns for stronger furniture joints across twenty-plus years of professional work, I learned everything there is to know about letting the wood tell you how it wants to be cut. Today, I will share it all with you.
Before you cut a single joint, read the board in front of you. Every piece of lumber tells a story in its grain pattern, and that story predicts how the wood will behave under stress, how it will respond to your tools, and whether your joint will hold for decades or fail in five years. Learn this language and you will make better decisions before the first saw stroke.
Understanding Grain Direction

Wood fibers run like overlapping feathers. When you plane or chisel with the grain, you smooth those feathers flat and the tool glides. Work against the grain and you lift them, creating tearout and rough surfaces that weaken any glue bond you attempt. The same principle applies to every joint you cut.
Look at the board edge where the grain lines angle one direction or the other. That angle tells you which way the fibers overlap inside the board. Push a sharp chisel along the surface — if it slides cleanly, you are with the grain. If it digs in and tears, you are going the wrong way. I do this test on every board before marking out a joint. Five seconds of checking saves thirty minutes of cleanup.
Grain Orientation in Joints
Probably should have led with this section, honestly. A mortise cut against the grain tears constantly. The chisel lifts fibers instead of severing them, leaving ragged walls that weaken the glue surface area. Rotate your workpiece or rearrange your layout so the chisel pushes fibers flat rather than peeling them up.
Tenon shoulders must cross the grain cleanly. Sawing across grain generally causes less tearout than sawing along it, but the exit side of any crosscut still needs protection. Score a knife line to sever surface fibers before sawing, and position the show face where the saw enters rather than where it exits. The entry side stays clean. The exit side is where fibers blow out.
The End Grain Problem
End grain absorbs glue like a sponge, starving the joint of adhesive before it can cure. End grain also crushes more easily under load than face or edge grain. These two properties combined make pure end-grain-to-end-grain joints nearly useless for structural work.
That’s what makes good joinery endearing to us woodworkers who care about longevity — effective joints always incorporate face-grain-to-face-grain contact where the real strength comes from. Dovetails work despite connecting end grain pieces because the tail and pin cheeks are face grain surfaces. The mechanical interlock adds holding power, but the face grain glue surfaces provide the actual adhesive bond that keeps the joint tight over decades.
Picking Boards for Critical Joints
Straight, parallel grain makes every joint easier to cut, fit, and glue. Curved or twisted grain fights your tools at every step and creates unpredictable internal stress. For joints that carry structural loads — table legs, chair frames, bed rails — choose the straightest lumber in your shop regardless of how boring the figure looks.
Quartersawn boards with grain running vertically through the thickness work better for thin, delicate parts like drawer sides and door frames. Flat-sawn boards tend to cup and warp more aggressively with seasonal humidity changes, stressing joints that were tight when assembled but loosen as the wood moves.
Reading the End Grain
Check the end of every board to see how it was cut from the log. Growth rings curving across the board width indicate flat-sawn lumber. Rings running mostly straight up and down indicate quartersawn. The orientation affects both dimensional stability and how the board presents its figure to the surface.
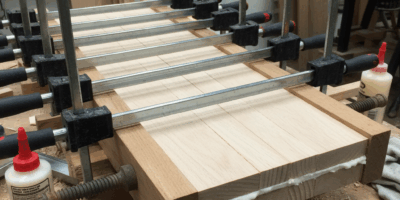
When edge-gluing panels, alternate ring orientations so cupping tendencies oppose each other rather than compound. A panel where all rings curve the same direction will cup as a unit in humid weather. Alternating rings creates competing forces that cancel out, producing a more stable panel even when individual boards want to move.
Working With Wild Grain
Sometimes you need that figured board for its beauty despite its difficult grain behavior. Curly maple, bird’s-eye, and crotch wood all present grain challenges that straight-grained lumber avoids. In these cases, take lighter cuts with sharper tools. Use a very low blade angle or switch to a scraping cut instead of a slicing action. Accept that fitting will require more patience and more test assemblies.
Keep figured wood away from areas requiring precise flat surfaces or tight mechanical joints. Use it for panels that float freely in grooves rather than frames that must stay dead flat under seasonal stress. Put the wild grain where people can appreciate its beauty without requiring it to perform structurally.
Making It a Habit
Handle every board before committing it to your cut list. Run your hand along the surface. Look at it in raking light from a low angle. Check both faces and both edges. The few minutes spent reading each piece of wood save hours of fighting difficult grain during joinery.
Mark grain direction with chalk arrows as you dimension your lumber. When it comes time to cut mortises, tenons, or dovetails, those arrows instantly remind you which way to orient the workpiece for the cleanest possible cuts. Wood is not uniform like metal or plastic. Each piece has personality that affects your work, and reading grain direction is how you listen to what the material is telling you before you start cutting.


Stay in the loop
Get the latest master wood crafters updates delivered to your inbox.