
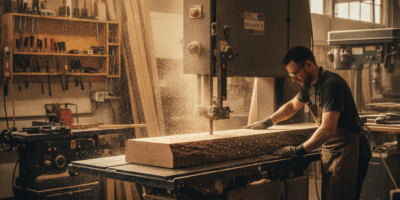
Drawboring has gotten complicated with all the YouTube demonstrations, hand-tool forum debates, and timber framing romanticization flying around. As someone who has cut hundreds of drawbored mortise and tenon joints in everything from dining chairs to workbenches, I learned everything there is to know about where this technique actually earns its keep. Today, I will share it all with you.
Glue fails. Wood shrinks. Joints loosen over time. Every woodworker knows these truths, yet we keep gluing mortise and tenon joints and hoping for the best. Drawboring offers a centuries-old solution that transforms hope into mechanical certainty. Once pinned, a drawbored joint tightens itself and stays tight permanently.
The Principle

Drawboring offsets the pin holes between mortise and tenon. The hole through the mortise cheeks sits slightly closer to the shoulder than the hole through the tenon. When you drive a tapered pin through these offset holes, it pulls the tenon deeper into the mortise, jamming the shoulder tight against the mortised piece.
That’s what makes drawboring endearing to us joint-obsessed woodworkers — the mechanical pull replaces clamp pressure during glue-up, and more importantly, it remains active permanently. As wood shrinks and glue crystallizes over decades, the pin continues applying its drawing force. The joint physically cannot loosen because it’s locked in three dimensions.
Offset Calculation
The offset amount depends on wood species and pin size. Hardwoods tolerate less offset than softwoods because they resist the bending force on the pin more aggressively. Most furniture applications use 1/16 to 1/8 inch offset with 1/4 inch pins. I tend toward the smaller end of that range for hardwoods and the larger end for softwoods.
Mark the mortise hole location first, drilling through both cheeks at the same position. Then insert the tenon and transfer the hole location by running a drill bit through the mortise holes to mark the tenon. Remove the tenon and mark your offset toward the shoulder from these transfer marks. Getting this sequence right matters — reverse it and the offset pulls the wrong direction.
Drilling the Holes
Drill the mortise holes before assembly, while you have clear access. Use a drill press or careful hand drilling to ensure perpendicular holes. Elongated or angled holes reduce drawing action and can split the pin during driving.
The tenon holes can be slightly undersized since the pin will find its way. Some craftsmen drill these holes slightly larger to reduce the bending stress on the pin. Either approach works if your offset is appropriate for the species you’re working with.
Making the Pins
Traditional drawbore pins are octagonal in cross-section, split from straight-grained billets. The corners of the octagon bite into the hole walls better than round pins, preventing any rotation or back-out. If you’ve never tried octagonal pins, they’re worth the extra effort at least once.
For practical purposes, you can use dowels. Choose straight-grained stock and taper one end slightly with sandpaper or a pencil sharpener. The taper helps start the pin in the offset holes without immediately binding. Avoid buying the cheapest dowels at the hardware store — they’re often made from compressed material that shatters under stress.
Pin length should exceed the total mortise depth plus tenon thickness by about an inch. You’ll trim the excess flush after driving.
Assembly Process
Apply glue to the joint as normal. Insert the tenon and use a drawbore pin — a metal rod with a tapered end — to test that the offset holes align close enough for the wooden pin to navigate. If the test pin won’t pass, reduce your offset and re-drill the tenon holes. Probably should have led with this section, honestly — testing before committing saves more joints than any other single habit.
Drive the wooden pin using a mallet, stopping when the joint pulls fully tight. You’ll feel the resistance increase as the offset forces the tenon home. If the pin breaks, your offset was too aggressive or your wood too dry. Back up, reassess, and try again with less offset.
Multiple Pins
Wide tenons need multiple pins to prevent racking. Space them evenly across the tenon width, with each pin offset the same amount toward the shoulder. The combined drawing force multiplies with each additional pin.
For visual effect, you can stagger the pins in a pattern or use contrasting wood species. Drawbored joints were often proudly displayed in traditional furniture as evidence of quality construction. A walnut pin through cherry or an ebony pin through maple announces itself deliberately.
When to Drawbore
Use drawboring on structural joints that must never loosen: chair legs, table aprons, bed rails, and workbench legs. Skip it for joints that might someday need disassembly for repair — the pin makes non-destructive disassembly essentially impossible.
Drawboring also eliminates the need for complicated clamping setups. When you’re building without a shopful of clamps, the self-clamping action becomes invaluable. Timber framers raised entire buildings using only drawbored joints and wooden pegs — no glue, no metal fasteners, no clamps. The technique scales from jewelry boxes to barn frames.
Master this technique and you’re connecting to an unbroken tradition of woodworking that trusted mechanical advantage over chemistry. The joints you make today will still be tight when your great-grandchildren inherit the furniture.


Stay in the loop
Get the latest master wood crafters updates delivered to your inbox.